How to Measure a V-Belt — 3-Step Quick Reference
To measure a V-belt you need two dimensions: the cross-section (top width × height) which identifies the profile (A, B, SPA, SPB etc.), and the length (outside circumference or datum length) which sets the part number. The compact chart below covers all V-belt cross-sections at a glance; the full step-by-step process — including measuring worn belts, banded belts and reading worn part numbers — follows.
| Section | Top Width | Height | Type / Use |
| Z (10) | 10mm | 6mm | Classical — light duty |
| A (13) | 13mm | 8mm | Classical — light to medium |
| B (17) | 17mm | 11mm | Classical — standard industrial |
| C (22) | 22mm | 14mm | Classical — heavy duty |
| D (32) | 32mm | 19mm | Classical — very heavy duty |
| SPZ | 10mm | 8mm | Narrow / wedge — modern industrial |
| SPA | 13mm | 10mm | Narrow / wedge — modern industrial |
| SPB | 17mm | 14mm | Narrow / wedge — modern industrial |
| SPC | 22mm | 18mm | Narrow / wedge — modern industrial |
The 3 steps: (1) Identify the cross-section by measuring top width and height with calipers — match to the chart above. (2) Measure the belt length — for an off-machine belt, measure outside circumference; for a belt still installed, measure pulley centre-to-centre distance. (3) Convert to datum length and find the part number. Each step is detailed in full below.
The Belt's Broken. Now What?
It's 7am. The compressor belt has snapped, the machine is down, and you need a replacement — fast. You pull the old belt off and stare at it. The part number is either worn off completely or you can just make out a "B" and what might be a "6". Sound familiar?
Measuring a V-belt is one of those skills that takes five minutes to learn and saves hours of frustration. Get it right and you order the correct belt first time. Get it wrong and you're waiting for another delivery while the machine sits idle.
This guide covers every method for measuring a V-belt — whether the belt is in your hand, still on the machine, or gone completely. We'll cover the tools, the steps, the conversions, and the mistakes that catch people out every time.
What You'll Need
You don't need specialised equipment. Most of these are already in your workshop or toolbox.
For measuring cross-section (width and height):
- Vernier calipers or digital calipers — the best tool for this. Accurate to 0.1mm and easy to use on the belt profile.
- A steel rule and set square — workable if you don't have calipers. Lay the belt flat and measure carefully.
- A V-belt gauge card — some suppliers provide these as a free reference. Slots cut to each cross-section; you drop the belt in to identify the section.
For measuring belt length:
- A dressmaker's tape measure — this is the unsung hero of belt measurement. Flexible, long enough for most belts, and far easier to use than a steel tape on a curved surface. If you don't have one in the workshop, get one — they cost next to nothing and are invaluable for this exact job.
- A piece of string or cord and a steel rule — the old-school method. Wrap the string around the belt, mark it, lay it out straight and measure. Reliable when you don't have a tape.
- A steel tape measure — usable but less ideal. Steel tapes don't follow curves well and can spring back on you. Use a dressmaker's tape if you can.
Optional but useful:
- A permanent marker for marking reference points on the belt
- A flat workbench or floor surface to lay the belt on
- Your phone, so you can cross-reference the size chart at AIMS V-Belt Sizing & Identification Guide

Step 1 — Identify the Cross-Section
Before you measure length, you need to know the section. A B-section belt and a C-section belt can have similar lengths, but they will not fit each other's sheave grooves. Get the section wrong and the belt won't seat correctly regardless of how accurately you measured the length.
The two measurements you need:
- Top width — the widest face of the belt, measured straight across
- Height — the thickness of the belt, measured at the centre from top face to bottom tip
How to measure with calipers:
- Hold the belt so you're looking at the cross-section end-on.
- Open the calipers and measure the top width. Take the reading at the widest point.
- Now rotate the calipers 90° and measure the height from the flat top surface down to the bottom tip of the V.
- Match both measurements to the table below.
How to measure without calipers:
Lay the belt flat on a workbench with the top face up. Use a steel rule to measure the width. For the height, stand the belt on its tip and measure from the bench surface to the top face. The measurements won't be as precise, but they'll be close enough to identify the section.
V-Belt Cross-Section Identification Table
| Section | Top Width | Height (mm) | Type |
|---|---|---|---|
| Z | 10mm (3/8") | 6 | Classical |
| A | 13mm (1/2") | 8 | Classical |
| B | 17mm (21/32") | 11 | Classical |
| C | 22mm (7/8") | 14 | Classical |
| D | 32mm (1-1/4") | 19 | Classical |
| E | 38mm (1-1/2") | 23 | Classical |
| SPZ | 10mm | 8 | Narrow wedge |
| SPA | 13mm | 10 | Narrow wedge |
| SPB | 17mm | 14 | Narrow wedge |
| SPC | 22mm | 18 | Narrow wedge |
Note on classical vs narrow wedge: The Z and SPZ sections have the same top width (10mm), as do A/SPA (13mm), B/SPB (17mm), and C/SPC (22mm). The difference is the height — narrow wedge belts are taller relative to their width. An A section is 8mm tall; an SPA is 10mm tall. If you only measure the top width, you may confuse a classical with a narrow wedge belt. Always measure both dimensions and confirm which sheave groove type the machine uses.
Quick field check — the angle test:
Classical belts have a 40° included angle (the V is slightly wider and shallower). Narrow wedge belts have a 34° angle (the V is steeper and deeper). You won't be able to measure this precisely in the field, but you can see the difference by eye once you know what to look for. If in doubt, measure both width and height and refer to the table.

Step 2 — Measure the Belt Length
V-belt length is specified as the datum (pitch) circumference — the length measured at the neutral axis running through the centre of the belt's reinforcing cord. This is not the same as the outside circumference (longer) or the inside circumference (shorter).
When you measure manually, you'll almost always be measuring the outside circumference. That's fine — you just need to apply a correction factor at the end. We'll cover that in Step 3.
Choose your method based on what you have in front of you.
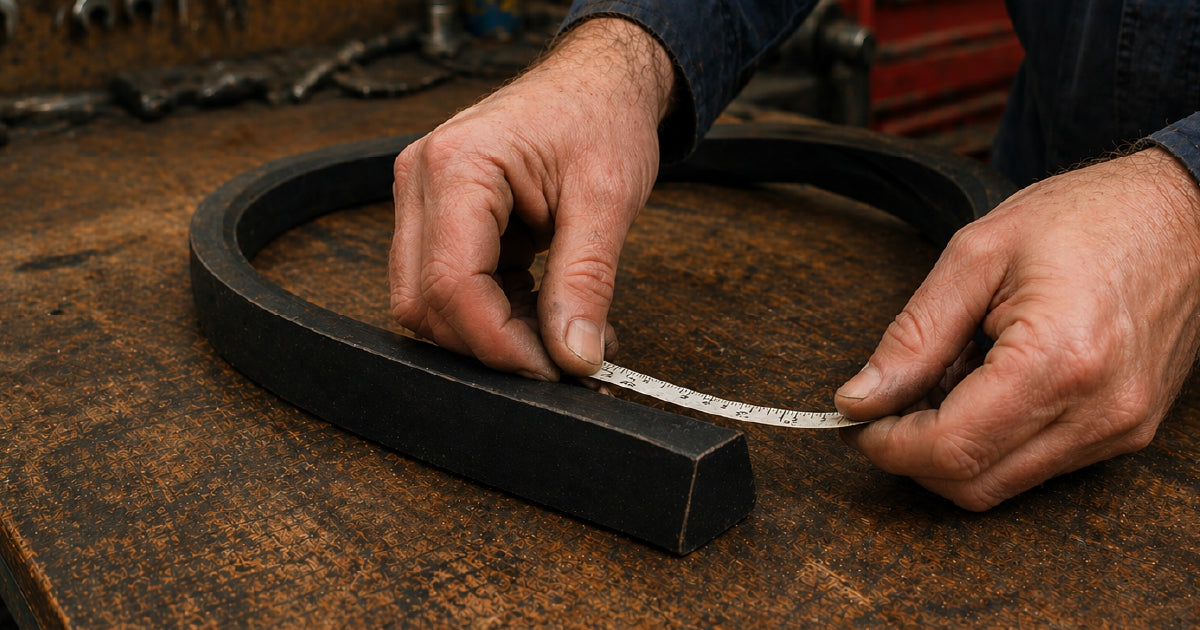
Method A — Belt in Hand (Most Common)
This is the situation most people face: the belt has failed, you've pulled it off, and you need to measure what you've got.
Using a dressmaker's tape:
- Lay the belt flat on the ground or a large workbench to form a complete loop.
- Start at any point on the belt's outer edge and wrap the dressmaker's tape around the outside of the belt, following the curve all the way around until you return to your starting point.
- Read the measurement where the tape meets your start point. This is the outside circumference.
- Write it down — you'll convert it to datum length in Step 3.
Tip: Keep the tape flat against the belt surface and don't let it ride up or cut across. Follow the very edge of the outer face. If the belt is stiff and won't lie flat, warm it slightly in the sun or a warm room first — cold rubber is stiffer and harder to work with.
Using string and a steel rule:
- Loop a piece of string or cord around the outside of the belt.
- Mark the string where it meets itself with a permanent marker or by pinching it with your fingers.
- Lay the string out straight on the bench and measure from the start to your mark with a steel rule.
- This gives you the outside circumference.
Tip: Use a non-stretch cord — thin nylon string or cotton cord is ideal. Elastic string gives you a false reading. Fishing line works well.
For very long belts:
If the belt is too large to loop on a workbench, lay it out on the floor and measure in sections. Start at one point, measure in a straight line along the outer edge to the belt's midpoint, note the measurement, then continue around and add the two halves together. Alternatively, lay it flat in a large loop and use two people — one to hold the tape start and one to walk around the belt.
Method B — Belt Still on the Machine
Sometimes you need to identify a belt while it's still running — or you want to note down the size before it fails completely. You can measure it without removing it.
The mark-and-roll method:
- With the machine switched off and isolated, make a small chalk or paint mark on the outer face of the belt where it sits on one sheave.
- Make a corresponding mark on the sheave at the same point.
- Place a tape measure or fold a piece of paper as a reference point on the floor or bench next to the drive.
- Slowly rotate the sheave by hand until the belt has made exactly one full revolution — the mark on the belt returns to the mark on the sheave.
- Meanwhile, measure the distance the belt has travelled. A simpler way: mark the belt at two points a known distance apart (say 100mm), then use that as a measuring wheel as you rotate the belt around the sheave. Count the number of belt lengths in one full circuit.
This method works well on smaller drives where you can easily rotate the sheave by hand. For larger drives, Method C (measuring the path) may be easier.
The string path method:
- With the machine switched off and isolated, run a piece of string along the exact path the belt follows — over both sheaves, following the same route as the belt.
- Mark where the string meets itself.
- Lay the string out straight and measure.
Important: Run the string along the pitch line of the sheave — at the mid-depth of the groove, not the top edge. The belt rides in the groove, not on top of the sheave flange. If you run the string along the top edge of the sheave, your measurement will be slightly long.
Method C — Belt Gone Completely
The belt has disintegrated, been lost, or you're replacing a drive with no existing belt to measure. In this case you measure the drive itself.
- Measure the centre distance — the distance between the centre of the driving shaft and the centre of the driven shaft.
- Measure (or calculate) the pitch diameters of both sheaves. If sheave dimensions are not marked, measure the outside diameter with a steel rule or tape measure, then subtract twice the groove depth to estimate the pitch diameter. Sheave groove depth varies by section (approximately 4mm for A, 6mm for B, 8mm for C).
- Use the standard belt length formula:
Belt length (datum) ≈ 2C + 1.57(D + d) + (D − d)² / 4C
Where:
C = centre distance (mm)
D = pitch diameter of larger sheave (mm)
d = pitch diameter of smaller sheave (mm)
Example: Centre distance 400mm, large sheave 150mm pitch diameter, small sheave 75mm pitch diameter.
Length ≈ 2(400) + 1.57(150 + 75) + (150 − 75)² / 4(400)
= 800 + 353 + 5625/1600
= 800 + 353 + 3.5
= 1156.5mm datum length
This result is a calculated estimate — always round to the nearest standard belt length and choose the closest available size. Small variations in centre distance adjustment will accommodate slight differences.

Step 3 — Convert to Datum Length and Find the Part Number
If you measured the outside circumference (Methods A or B using the outside of the belt), you need to convert to datum length before looking up the part number.
Subtract the correction factor for your belt section from the measured outside circumference:
| Section | Subtract from OC to get datum length |
|---|---|
| Z | 13mm (½") |
| A | 25mm (1") |
| B | 33mm (1.3") |
| C | 41mm (1.6") |
| D | 58mm (2.3") |
| SPZ | 8mm |
| SPA | 10mm |
| SPB | 13mm |
| SPC | 17mm |
Example: You've measured an A section belt and got an outside circumference of 1067mm. Subtract 25mm → datum length = 1042mm. The closest standard size is 1041mm (A41 in imperial = A1041 in metric). Your replacement belt is an A41.
When your measurement falls between two standard sizes: Choose the shorter belt. Most drives have a motor or take-up bearing that can be adjusted to achieve correct tension. A belt that's slightly short is tensioned correctly with the adjuster near its limit; a belt that's slightly long may not tension at all. If the adjuster is already at its limit, choose the longer size and check whether the centre distance can be increased.
For full size charts — every standard length for Z, A, B, C, D, SPZ, SPA, SPB, and SPC sections — see our V-Belt Sizing & Identification Guide.
How to Read a Worn Part Number
If you can still make out part of the belt marking, here's how to decode what you can see:
Classical belt numbers follow the pattern: [Section letter] + [datum length in inches]
- B68 = B section, 68-inch datum circumference (1727mm)
- A40 = A section, 40-inch datum circumference (1016mm)
- C90 = C section, 90-inch datum circumference (2286mm)
Narrow wedge belt numbers follow: [SP section] + [datum length in mm]
- SPB1600 = SPB section, 1600mm datum circumference
- SPA1000 = SPA section, 1000mm datum circumference
Some belts include additional prefix or suffix codes: "X" or "HC" means cogged/raw-edge (e.g., XB68 or B68HC). A number prefix means banded/joined (e.g., 3B68 = three B68 belts joined). The core section and length designation is always the same.
What if you can only see a letter?
If you can read the section (e.g., "B") but the number is gone, you still know half the story. Measure the outside circumference as described in Step 2, apply the B section correction (subtract 33mm), and you have your datum length. Match that to the size chart and you're done.
What if even the letter is gone?
Start from scratch with Step 1 — measure the cross-section. You'll identify the section from the dimensions and then proceed to measure the length. Many experienced maintenance people prefer to measure from scratch even when there is a readable number, because worn belts stretch over time and the measured size can differ from the nominal size. The machine's original design spec is the most reliable reference when available.
Measuring Worn Belts — the Stretch Problem
Here's something that catches people out regularly: old belts stretch. A belt that has been running for years under tension will measure longer than its nominal size. A B68 belt that has been in service for 12 months may measure as a B70 or even B71 when you wrap a tape around it.
If you measure a worn belt and order a replacement of exactly that size, the new belt will be slightly short and will require the drive to be adjusted. This is normal and expected — the new belt is the correct nominal size; the old one had stretched.
The right approach:
- Read the part number from the old belt if it's visible — that's the correct size regardless of how the belt now measures.
- If the number is gone, measure the drive path (Method B or C) rather than the belt itself — the drive geometry doesn't lie.
- If you must measure the old belt, account for stretch by going one standard size shorter than your measurement suggests. This is a rule of thumb, not a guarantee — some belts stretch more than others depending on load, heat, and age.
Measuring Banded (Joined) Belts
Banded belts — multiple V-belts joined by a tie band — are measured the same way as single belts. The part number includes the belt count as a prefix: 3B68 means three B section, 68-inch belts joined together.
To measure: identify the section from a single belt's cross-section (the tie band doesn't affect the profile), then measure the outside circumference of one belt strand (not the total width of the banded set). Apply the conversion as normal.
When ordering a replacement banded belt, always order a matched banded set — never attempt to join individual belts with tape or other means. Banded belts require sheaves with a relieved inter-groove channel to accommodate the tie band.
Common Mistakes — and How to Avoid Them
| Mistake | What Happens | How to Avoid It |
|---|---|---|
| Ordering by outside circumference without converting to datum | Belt arrives too long, won't tension correctly | Always subtract the section correction factor from OC before ordering |
| Confusing classical and narrow wedge sections by measuring only top width | Belt doesn't seat in groove; rapid wear or immediate slip | Always measure both top width AND height; confirm sheave groove type |
| Measuring a stretched worn belt and ordering the same measured size | New belt is too short; drive won't reach correct tension without adjustment | Read the part number from the old belt, or measure the drive path instead |
| Using a steel tape directly on the belt curve | Steel tape springs off the curve; inaccurate reading | Use a dressmaker's tape or string — flexible measuring tools only |
| Running the string along the sheave flange top instead of the pitch line | Measurement comes out slightly long; belt may be slack when installed | Run string at mid-groove depth, not on top of the sheave flange |
| Ordering one new belt for a multi-belt drive | New belt is shorter/stiffer than old belts; takes all the load; fails quickly | Always replace all belts in a matched set when running multiple strands |
| Choosing a longer belt when measurement falls between sizes | Belt can't be tensioned; slips from day one | When in doubt, go shorter — most drives have enough adjustment range |
Quick Reference — Measurement Checklist
Print this out and stick it in the toolbox:
- ☐ Identify the section — measure top width and height with calipers. Match to section table.
- ☐ Check for a readable part number — if visible, use it. Done.
- ☐ If no number: measure outside circumference — dressmaker's tape around the outside of the belt loop.
- ☐ Convert OC to datum — subtract the section correction factor.
- ☐ Match to size chart — find the nearest standard size.
- ☐ When between sizes: go shorter — the drive can be adjusted.
- ☐ Multi-belt drive: order a full matched set — never mix old and new belts.
What to Do When You're Still Not Sure
If you've measured carefully and you're still uncertain between two sizes, there are three reliable fallback options:
1. Measure the machine's name plate. Many compressors, pumps, fans, and agricultural machines carry a manufacturer's plate with the belt specification. It may list the belt number directly, or give the sheave diameters and centre distance you need for the formula in Method C.
2. Check the OEM manual or parts diagram. If you have access to the original equipment documentation, the belt specification is listed there. This is always the most reliable source — it reflects what the manufacturer designed the drive for.
3. Call a specialist. If you have the sheave diameters, centre distance, and the application (what the machine does and at what power), any industrial belt supplier can calculate the correct belt for you. Bring those measurements to AIMS Industrial and we'll confirm the right specification before you order.
And once the belt is identified, sheave selection is the next decision — for the full pulley reference covering V-belt sheave profiles, taper lock mounting, alignment, and pulley wear diagnostics, see our Pulley Types Guide.
Frequently Asked Questions
Can I use a regular tape measure to measure a V-belt?
A standard steel tape measure can work, but it's awkward — the rigid blade doesn't follow the curve of the belt well and tends to spring away. A dressmaker's tape (the soft fabric or vinyl type used in sewing) is much better suited to the job: it's flexible, long enough for most belts, and sits flat against the belt surface as you wrap it around. If you don't have one, a piece of non-stretch string wrapped around the belt and then laid out straight against a steel rule gives you an equally accurate result.
How do I measure a V-belt that's still on the machine?
With the machine isolated and at rest, you have two options. First, the string path method: run a piece of non-stretch string along the exact belt path — over both sheaves following the groove centre — and measure where it meets itself. Second, the mark-and-roll method: mark a point on the belt and the sheave, then rotate the sheave by hand and measure the distance the belt travels in one full revolution. Both methods give you a measurement close to the datum circumference. Apply the section correction factor to convert if needed.
What if I measure the belt and the number doesn't match any standard size?
Old belts stretch. A belt that has been in service for 12+ months under load can measure 25–50mm longer than its nominal size. If your measurement falls between standard sizes, or is slightly longer than the next standard size up, the belt has most likely stretched. Go down one standard size from your measurement. If you can see or partially read the original part number on the belt, trust that over your measured length.
How do I tell a classical V-belt from a narrow wedge (SP) belt when they have the same top width?
Measure the height. Classical and narrow wedge belts share the same top widths (10mm, 13mm, 17mm, 22mm) but narrow wedge belts are taller. An A section classical is 8mm tall; an SPA narrow wedge is 10mm tall. The narrow wedge also has a steeper V angle (34° vs 40°) which you can see by eye once you're familiar with it. If you're unsure, check the sheave — classical sheaves have a shallower groove and narrow wedge sheaves have a deeper, steeper groove. You cannot interchange belts between the two sheave types.
Do I measure the inside, outside, or middle of the belt?
When wrapping a tape around a belt, you'll naturally measure the outside circumference. This is fine — just apply the section correction factor to convert it to datum (pitch) circumference before ordering. V-belt part numbers are based on datum length, not inside or outside circumference. The datum line runs through the neutral axis of the belt where the reinforcing cord sits.
How accurate does my measurement need to be?
Within 5–10mm is generally sufficient for most applications, since you'll be rounding to the nearest standard belt size anyway. Classical belts come in standard sizes spaced about 25mm (1 inch) apart in the shorter lengths and 50–100mm apart in the longer lengths. If your measurement is accurate to within half a standard size increment, you'll select the correct belt. Don't obsess over getting it to the exact millimetre — focus on getting a clean, consistent wrap of the tape around the belt without it riding up or going slack.
My belt runs in a very awkward location and I can't remove it — how do I identify it?
If you can see the belt but can't reach it easily, try to read the part number from a safe distance with a torch and mirror. If the number is visible, that's your fastest answer. If you can't read it, you need the machine's specifications — check the name plate, the OEM manual, or contact the machine manufacturer with the model number. As a last resort, measure the sheave diameters and centre distance as best you can from the accessible side of the drive, and use the belt length formula to calculate the required belt length.
I need to replace a banded belt. How do I measure it?
Measure one belt strand of the banded set — the section and length of an individual belt within the band. The part number format adds a prefix for the number of strands: 3B68 = three B68 strands joined. Wrap your tape around one strand's outside circumference, apply the B section correction factor (subtract 33mm), and match to the size chart. Order the same number of strands as the original banded belt.
What's the minimum I need to know to order the right belt?
Two things: the cross-section and the datum length. The cross-section tells your supplier which sheave groove the belt fits; the datum length tells them how long to make it. If you can give your supplier those two pieces of information — even as an approximate (e.g., "B section, approximately 1700–1750mm datum") — they can identify the correct belt and confirm availability. Everything in this guide is aimed at finding those two numbers as quickly and accurately as possible.
Need the full size chart for your section? See our V-Belt Sizing & Identification Guide — full tables for Z, A, B, C, D, SPZ, SPA, SPB and SPC sections with outside circumference and datum length for every standard size.
Browse our full range of V-belts at AIMS Industrial — classical, wedge, cogged, and banded belts available for fast Australia-wide dispatch.
For belt-drive RPM calculation and pulley sizing, see our Pulley Speed Ratio guide.
People Also Ask — How to Measure a V-Belt
Q: How do you measure the length of a V-belt?
The most reliable method is to wrap a flexible tape or cord around both pulleys in the groove, following the belt path precisely. This gives the pitch circumference. Alternatively, use a purpose-made V-belt gauge wheel. Never measure a worn belt in isolation — the belt stretches over time, making the worn length longer than the correct replacement size.
Q: What does V-belt size mean?
V-belt sizes encode the cross-section type and pitch length. For classical V-belts, a letter prefix (A, B, C, D, E) indicates the width and depth profile. For metric narrow-section belts, the designation is SPZ, SPA, SPB, or SPC. The number following the section code is the effective pitch circumference — in inches for classical belts, millimetres for metric narrow section.
Q: What is the difference between outside length and pitch length on a V-belt?
Outside circumference is measured at the very top outer edge of the belt. Inside circumference is measured at the inner edge. The pitch length — which the belt size designation refers to — is measured at the neutral axis (cord layer) inside the belt. Neither outside nor inside measurement equals the pitch length; use pitch length for drive design and belt selection.
Q: How do I identify what V-belt section I need?
Measure the top width of the existing belt with a vernier caliper. Cross-reference the top width against a V-belt section chart to identify the section (A, B, C, SPZ, SPA, SPB, SPC). Drive power and small pulley diameter also influence section selection when designing from scratch — belt manufacturers publish selection charts combining these inputs.
Q: Can I use a different cross-section V-belt in the same drive?
No. V-belt sections are not interchangeable. Each section has a specific groove angle and depth profile matched to the corresponding pulley. Fitting a different cross-section — even if it physically fits in the groove — causes the belt to ride too high or too low, reducing drive efficiency, accelerating belt and pulley wear, and risking belt slip or early failure.
How can I measure a V-belt without a belt measuring tool?
Lay the belt on a flat surface and measure across the inside of the loop at its widest point for an approximate inside length, or wrap a flexible tape or a length of string around the outside for the outside circumference. Then note the section from the top width and depth. Give both the length and the section to the supplier and they can convert to the correct datum/pitch length. See our V-belt sizing guide.
Should I replace all belts on a multi-groove drive at once?
Yes. On a multi-belt drive, fit a matched set so every belt shares the load evenly. Mixing a new belt with used belts overloads the new one, because the older belts have already stretched, and the drive runs rough. Replace the whole set, and where the drive allows use a matched or banded set. See the V-pulleys and belts ranges.
How do I know if a V-belt has stretched past its useful life?
A stretched belt bottoms out in the sheave groove, rides low, or runs the drive out of tension adjustment. If you can't restore correct tension within the drive's take-up range, or the belt sits at or below the top of the groove, replace it — and check the sheave for wear at the same time. For running problems see our V-belt problems and solutions guide.