

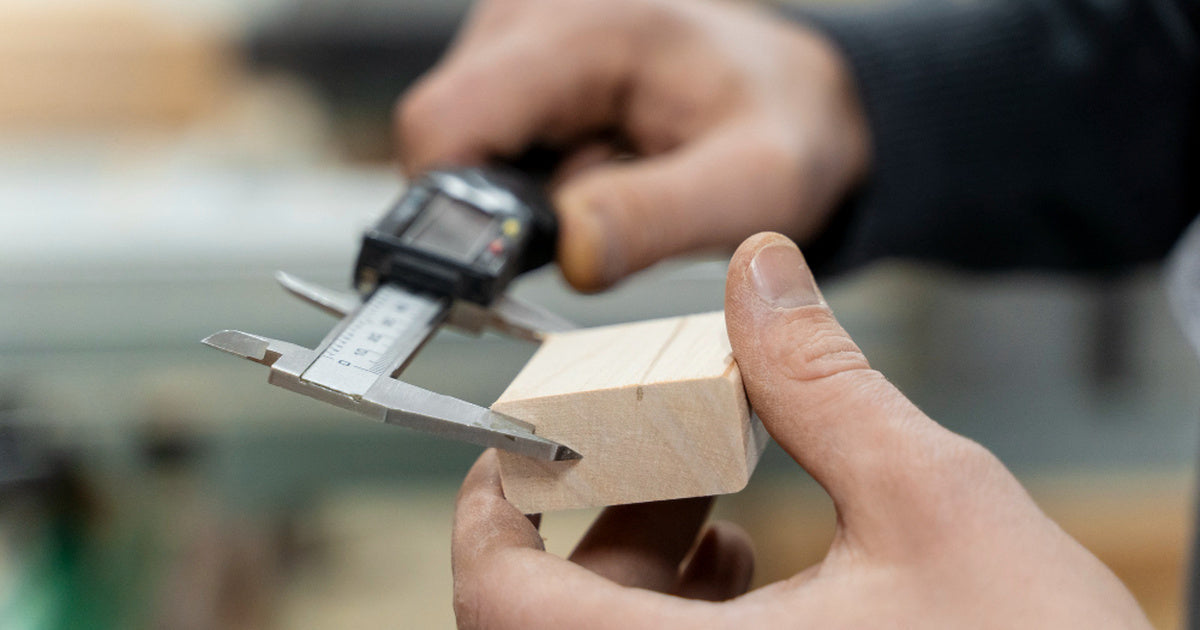
A vernier caliper is the go-to precision measuring tool in any serious Australian workshop, toolroom, or quality control environment. Digital models — often searched as an electronic vernier caliper — give the same mechanical measurement capability with an LCD readout for faster operation. All types measure outside diameters, inside diameters, depths, and step heights in a single instrument, to an accuracy of 0.02 mm or better. But pick one up for the first time and the scale can look baffling. This guide covers everything: how to read both the metric and imperial scales, the difference between vernier, digital, and dial types, when a cheap caliper is fine and when you need a Mitutoyo, and the calibration questions that come up in every workshop.
What Is a Vernier Caliper?
A vernier caliper is a precision hand tool that uses two scales — a fixed main scale and a sliding vernier scale — to resolve measurements far finer than the unaided eye could read from a ruler. The principle was devised by French mathematician Pierre Vernier in 1631 and has remained essentially unchanged since: the vernier scale subdivides each main scale division into smaller increments, allowing measurements to 0.05 mm (1/500 of a millimetre) or 0.02 mm (1/50 of a millimetre) depending on the instrument.
In Australian workshops, "vernier caliper" and "vernier calliper" (double-l) are both used. The single-l spelling is more common in product catalogues and industry. Both are correct.
Vernier calipers measure four things:
- Outside diameter (OD) — bar stock, bolt shanks, pipe OD, turned parts
- Inside diameter (ID) — bore sizes, groove widths, pipe ID
- Depth — slot depth, counterbore depth, shoulder height
- Step — height difference between two parallel surfaces
For inside diameter measurement where caliper accuracy isn't enough — engine cylinder bores, bearing housings, hydraulic cylinders, precision-machined bores to drawing tolerance — a dedicated bore gauge is the right tool. See our Bore Gauge Types Guide for telescopic gauges, small hole gauges, dial bore gauges and selection by application.
Types of Calipers: Vernier, Digital, and Dial
Three distinct types share the "caliper" name. Understanding the differences matters before you buy.
Vernier (manual scale)
The traditional type. No battery, no display — measurement is read directly from two engraved scales. Robust, reliable, and immune to battery failure or coolant ingress. The learning curve is steeper than digital, but once mastered, a good vernier caliper is the most reliable tool in the kit. Standard accuracy is ±0.05 mm (20-division scale) or ±0.02 mm (50-division scale).
Digital (electronic display)
The same mechanical body as a vernier, but with a linear encoder that drives an LCD display. Sometimes called an electronic vernier caliper in product catalogues and online searches. Readings appear instantly in your choice of metric or imperial — no scale interpolation required. Ideal for high-volume inspection work where speed and operator fatigue are factors. For a deep dive into capacitive encoder technology, Mitutoyo Absolute encoders, IP54 vs IP67 ratings, battery life, Digimatic and Bluetooth data output, calibration, and full selection criteria, see our Digital Caliper Guide.
Dial caliper
A rack-and-pinion mechanism drives a rotating dial face that replaces the vernier scale. Easier to read than a vernier scale, no battery required, good for rapid comparison gauging. Less common in AU industrial settings than vernier or digital, but valued in toolroom and fine-instrument work. Typical accuracy plus or minus 0.02 mm. For a deep dive into the rack-and-pinion mechanism, dial reading procedure, the counterfeit Mitutoyo problem and how to spot fakes, JIS B 7507:2022 accuracy specifications, and the Sutton Tools authorised supply chain in Australia, see our Dial Caliper Guide.
| Feature | Vernier | Digital | Dial |
|---|---|---|---|
| Reading method | Two engraved scales | LCD display | Dial gauge + main scale |
| Typical accuracy | ±0.02–0.05 mm | ±0.01–0.02 mm | ±0.02 mm |
| Battery required | No | Yes (CR2032) | No |
| Metric/imperial switching | Fixed to one scale (usually) | Button switch | Fixed to one scale |
| Moisture resistance | Excellent (no electronics) | Varies — IP rating critical | Good |
| Learning curve | Moderate | Low | Low–moderate |
| Best for | Toolroom, precision work, no-battery environments | Production, inspection, speed | Comparison gauging, toolroom |
Parts of a Vernier Caliper Explained
Before reading the scale, identify each part of the instrument.
- Lower jaws (external) — the large jaws at the bottom. Close them around a shaft or bar to measure outside diameter or width.
- Upper jaws (internal) — the smaller, knife-edged jaws at the top. Open them inside a bore or groove to measure inside diameter.
- Depth rod — the thin blade that extends from the tail of the caliper as the jaws open. Used to measure the depth of holes and slots.
- Main scale — the fixed scale on the beam, graduated in millimetres (or inches on imperial instruments).
- Vernier scale — the sliding scale on the jaw assembly. It is shorter than the main scale and divided into 20 or 50 divisions, creating the fine-reading capability.
- Lock screw — a small screw (sometimes a thumb wheel) that locks the jaw position. Always lock before removing the caliper from the part to avoid reading drift.
- Fine adjustment thumb wheel — on better instruments, a small wheel for controlled final movement of the jaw. Makes consistent closing force easier to achieve.
How to Read a Vernier Caliper — Metric
The process is the same for 0.02 mm and 0.05 mm instruments — only the number of vernier divisions differs. Here is the full step-by-step method for metric (mm).
Step 1: Zero check
Close the jaws fully with no object between them. The zero line of the vernier scale should align exactly with the zero line of the main scale. If it does not, you have zero error — record the offset and correct your readings (see Common Mistakes section below).
Step 2: Place the part and close the jaws
Slide the jaws onto the part with light, consistent pressure — not a tight pinch. Overtightening deflects the jaws and introduces error. Lock the screw.
Step 3: Read the main scale
Look at where the zero line of the vernier scale sits on the main scale. Read the last whole millimetre line that the vernier zero has passed. Do not include the next line if the vernier zero has not fully passed it.
Example: vernier zero sits between 23 mm and 24 mm → main scale reading is 23 mm.
Step 4: Read the vernier scale
Scan along the vernier scale from left to right. Find the single line on the vernier scale that lines up most precisely with any line on the main scale. Count which vernier division this is, then multiply by the least count.
- 0.05 mm instrument (20 divisions): each coinciding division = 0.05 mm. If the 7th division aligns → 7 × 0.05 = 0.35 mm
- 0.02 mm instrument (50 divisions): each coinciding division = 0.02 mm. If the 14th division aligns → 14 × 0.02 = 0.28 mm
Step 5: Add the readings
Total measurement = main scale + vernier reading.
Example (0.05 mm): 23 mm + 0.35 mm = 23.35 mm
Example (0.02 mm): 23 mm + 0.28 mm = 23.28 mm
Tip: the tilt trick for clearer line alignment
If the coincidence line is hard to identify, tilt the caliper slightly away from you and look along the scale lines at a shallow angle rather than straight down. This parallels the lines and makes alignment far clearer — a technique recommended by experienced machinists on Home Shop Machinist and Practical Machinist forums.
How to Read a Vernier Caliper — Imperial
Imperial verniers are graduated in inches, with the main scale typically divided into 1/16 in (0.0625 in) or 1/10 in (0.100 in) divisions. The most common imperial vernier has 25 divisions reading to 0.001 in (one thou).
Reading method (0.001 in instrument)
- Read the whole inches on the main scale.
- Read the number of 0.025 in divisions the vernier zero has passed (each large numbered mark = 0.100 in, each small division = 0.025 in).
- Find the coinciding vernier division. Multiply by 0.001 in.
- Add all three values.
Example: 0 whole inches + 3 × 0.025 in (= 0.075 in) + 18th vernier division (= 0.018 in) = 0.093 in
AU workshop note: Most Australian manufacturing and trade work is fully metric. Imperial calipers are still used when working on older American-spec equipment, US-sourced machinery, and some agricultural equipment where imperial fasteners are standard. If you work in a mixed environment, a digital caliper with instant metric/imperial switching is the most practical choice.
Least Count: 0.02 mm vs 0.05 mm — What Does It Mean?
The least count is the smallest increment a caliper can resolve — the finest reading it can give you. It is determined by the number of divisions on the vernier scale.
| Least count | Vernier divisions | Best for | Difficulty to read |
|---|---|---|---|
| 0.05 mm | 20 | General workshop, fitting, carpentry, fluid fittings | Easier — fewer lines to examine |
| 0.02 mm | 50 | Precision machining, toolroom, QC, bearing fits | Harder — more divisions, finer alignment needed |
For most maintenance and fitting work, 0.05 mm resolution is entirely adequate — the measurement tolerance of the application is rarely tighter than that. For precision bore work, shaft-to-bearing fits, and quality inspection where tolerances run to ±0.01–0.02 mm, the 0.02 mm scale (or a digital instrument) is the right choice.
A useful rule: if your drawing tolerance is tighter than ±0.10 mm, use a 0.02 mm caliper or a digital. If tolerance is ±0.20 mm or looser, 0.05 mm is sufficient.
How to Take the Four Types of Measurements
A vernier caliper is one of the most versatile instruments on any workbench — but a lot of users only ever use the big lower jaws and never touch the other three measurement capabilities. Each of the four measurement points earns its keep in different workshop situations, and knowing when to reach for each one is the difference between owning a caliper and actually using it properly.
① Outside diameter / width — the main lower jaws
The large lower jaws are what most people picture when they think "caliper". Close them around the outside of a part to measure outer diameter, thickness, or width. Light, consistent pressure — don't squeeze hard. Keep the jaw faces parallel to the measurement plane and don't rock or tilt the caliper. Lock the slider and read.
Typical uses: shaft outside diameter, bolt diameter, bar stock, plate thickness, tube OD, dowel pins, gauge stock, and any external dimension on a finished part. This is the go-to measurement for receiving inspection of round and flat stock, fastener verification, and tolerance checks on machined ODs.
② Inside diameter / bore — the upper knife-edge jaws
The smaller upper jaws face outward — open them inside a hole, bore, slot or groove until both edges make light contact with the walls. The jaws must be centred in the bore. Rock the caliper gently across the diameter to find the true maximum reading — that's the actual bore size; any smaller reading means the jaws aren't fully on the centre line.
Note that some calipers add a fixed offset (typically 10 mm) to inside jaw readings to account for the jaw geometry; check your instrument's documentation if the inside reading looks systematically off.
Typical uses: bore ID, hole diameter, slot width, groove width, pipe ID, bushing inside diameter, threaded hole minor diameter, machined recesses.
One practical application worth knowing: measuring the bore at a drill press or lathe spindle face with the inside jaws is the most reliable way to identify a Morse taper number when no markings are visible. MT bore diameters from MT0 to MT7 are distinct and non-overlapping, making a single caliper measurement enough to confirm the taper size. See our Morse taper guide for the full dimension table and identification method.
③ Depth measurement — the depth rod
A thin rod (sometimes called a depth blade or depth bar) extends from the tail of the caliper body as the jaws open. To measure depth, rest the flat beam end on the reference surface over the hole or slot, then slide the depth rod down until it touches the bottom. Keep the beam perfectly level across the reference surface — any tilt introduces cosine error and gives a depth reading slightly longer than the true value. Lock and read.
For blind holes, ensure the depth rod tip is actually touching the bottom of the hole, not resting on a chip or burr — this is a frequent source of error in workshop measurements. A quick visual or a gentle wiggle confirms the tip has reached the floor.
Typical uses: drilled hole depth, counterbore depth, blind tapped hole depth, slot depth, recess depth, machined pocket depth, threaded hole reach for bolt length selection.
④ Step / shoulder measurement — the flat back faces of the lower jaws
This is the measurement point most users never realise their caliper can do. The flat back faces of the lower jaws can measure the height difference between two parallel surfaces — like a step or shoulder on a turned part, a milled feature with a height transition, or any raised feature on a flat reference surface. Often overlooked, but genuinely useful on machined components.
To take a step measurement, place the back face of the fixed lower jaw flat on the lower (reference) surface, then slide the moving jaw across until its back face contacts the upper surface. The reading on the scale is the step height. The technique varies slightly by caliper design — some have explicitly machined step-measurement surfaces, others use the back of the lower jaws less precisely. Consult the manual for your specific caliper if precision matters.
Typical uses: shoulder height on turned parts, step depth on milled features, ledge measurement on machined housings, raised boss height, gasket-face step on flanges.
Pro tip — always zero the caliper before measuring. On vernier calipers, check that the closed jaws read 0.00 mm on the main and vernier scales together. On digital calipers, press the ZERO/ORIGIN button with the jaws fully closed and locked. Even a small offset (0.05 mm or so) compounds quickly when you're checking tolerance fits — a Grade 8.8 bolt seated in a clearance hole, an H7 shaft in an H7 bore, or a Morse taper bore identification all turn on tenths of a millimetre. Two seconds of zeroing is the cheapest measurement insurance you'll buy all day.
Digital vs Vernier vs Dial — Which Should You Use?
There is no single right answer. The best choice depends on your work environment, measurement volume, and personal preference.
Choose a vernier caliper if: you work in a wet, oily, or coolant-rich environment without IP-rated digital options; you need a battery-free tool for remote or field work; you want the most robust and maintenance-free instrument; or you are learning measurement skills properly from the ground up (reading a vernier scale builds understanding that digital reading does not).
Choose a digital caliper if: you take a high volume of measurements and need speed; you switch between metric and imperial regularly; you share the tool with operators who are not trained on scale reading; or you need SPC data output (Statistical Process Control — available on instruments like Mitutoyo Digimatic series). See our Digital Caliper Guide for the full breakdown — resolution vs accuracy, IP rating reality, Mitutoyo Absolute battery life, common failure modes, and how to choose between budget and premium tiers.
Choose a dial caliper if: you do comparison gauging (checking whether a part is in or out of tolerance relative to a reference) rather than absolute measurement; you prefer an analogue display without electronics; or you work in environments where digital display contrast is an issue (very bright outdoor light, extreme cold). See our Dial Caliper Guide for the full breakdown — the rack-and-pinion mechanism, reading to 0.001 inch in metric and imperial, rack failure modes, Mitutoyo Series 505 reality, counterfeit warning and spot-the-fake checks, and JIS B 7507 standards.
In practice, most serious Australian workshops keep at least one vernier and one digital caliper. The vernier goes into the toolbox; the digital stays at the bench or inspection table.
Budget vs Premium: Choosing Between Cheap and Mitutoyo
Australian workshop supply catalogues list calipers from under $20 to over $400. The range is not arbitrary — there are genuine and meaningful differences at each price point.
Budget ($15–$50)
Generic stainless steel digital or vernier calipers from Chinese manufacture. Adequate for carpentry, plumbing rough checks, DIY fabrication, and general layout work where tolerances are loose (±0.5 mm or wider). The main risks at this price are: zero drift after use, inconsistent closing force making readings vary, scale lines that are difficult to engrave clearly, and digital displays that fail when exposed to moisture or metalworking fluids. If the job is cutting timber or checking a rough weld gap, a budget caliper is fine.
Mid-range ($60–$150)
Better-quality stainless steel construction, tighter manufacturing tolerances on the jaw and beam, more legible scale engraving, and (for digital) more reliable encoders. Brands like Maxigear in the AIMS range sit in this category — solid workshop tools for maintenance fitters, machinists, and tradespeople who need reliable daily-use instruments without the cost of premium brands.
Premium ($150–$400+): Mitutoyo and equivalents
Mitutoyo, founded in Japan in 1934, is the global benchmark for precision measuring instruments. AIMS now stocks Mitutoyo calipers — a brand that needs no explanation in any serious toolroom or quality department. Here is what the premium price buys:
- Tighter accuracy specifications — typically ±0.02 mm across the full range, compared to ±0.03–0.05 mm for mid-range instruments
- Carbide-tipped jaws on selected models — dramatically longer wear life, especially in high-cycle production environments
- SPC output — Mitutoyo Digimatic series instruments output measurement data to a PC or data logger for Statistical Process Control, essential for ISO 9001 quality systems
- Traceable calibration certificates available — important for NATA-accredited laboratories and AS/NZS ISO 9001 audits
- Consistent closing force — finer manufacturing tolerances on the rack and jaw mechanism mean operator-to-operator variability is reduced
- Ingress protection — Mitutoyo Coolant Proof (CD-P series) calipers are IP67 rated, fully submersible for use at CNC machine tool stations
The honest answer on whether to buy cheap or premium: buy one of each. A budget or mid-range digital caliper for fast bench checks, rough sorting, and work where a drop or loss would sting less. A Mitutoyo vernier or digital caliper for precision machining, QC sign-off, and any measurement that ends up on a certificate or drawing. The Mitutoyo will outlive three or four budget instruments and remain accurate throughout its service life.
When budget is sufficient and when it is not:
| Application | Budget ($15–50) | Mid-range ($60–150) | Mitutoyo ($150+) |
|---|---|---|---|
| Carpentry / rough fabrication | ✅ Adequate | ✅ | Overkill |
| Maintenance fitting (±0.1 mm) | ⚠️ Marginal | ✅ Good choice | ✅ |
| Precision machining (±0.02 mm) | ❌ Not reliable | ⚠️ Borderline | ✅ Required |
| QC / ISO 9001 inspection | ❌ | ⚠️ With caveats | ✅ Required |
| Toolroom / surface grinder setup | ❌ | ⚠️ | ✅ Required |
Browse the AIMS vernier caliper range or the digital caliper range — both include mid-range Maxigear options and Mitutoyo precision instruments.
Common Mistakes and How to Avoid Them
1. Zero error — not checking before measuring
Zero error occurs when the vernier scale zero does not align with the main scale zero when the jaws are fully closed. It is caused by jaw wear, dirt between the jaws, or a knock to the instrument. The fix: always check zero before use. If error exists, record the offset (e.g., +0.04 mm) and subtract it from every reading, or adjust the instrument if it has a zero-set function (most digital calipers do).
On digital calipers: close jaws, press the zero/reset button. Done. On vernier calipers: if zero error is consistent, it can sometimes be corrected by loosening and repositioning the vernier scale, but this is a calibration task best done by a qualified metrology lab.
2. Parallax error — looking at the scale from an angle
If you read the vernier scale from an angle rather than directly perpendicular, your eye shifts the apparent alignment of the lines. The result is a reading error of one or two divisions — 0.02–0.10 mm. Always look straight down the scale, or use the tilt trick (see Reading section above) to make coincidence clearer.
3. Excessive closing force
Clamping the jaws tightly onto a soft material (aluminium, plastic, rubber, thin-walled tube) compresses the material and gives an artificially small reading. For consistent results, apply only the light resting pressure needed to feel jaw contact — particularly important on digital calipers where there is no tactile vernier engagement to guide you.
4. Reading the wrong scale (digital calipers)
Digital calipers display both metric and imperial — a button switches between them. After switching modes or after a battery change, confirm which unit is displayed before recording the measurement. A common real-world error: recording the imperial reading (e.g., 0.918 in) as if it were metric (23.31 mm) — the numbers are completely different.
5. Not locking before removing
Remove the caliper from the part without locking the jaw position and the reading will shift. Use the lock screw every time — even for quick checks. It costs one second and prevents errors.
6. Dirty jaws
Swarf, grinding dust, and coolant on the jaw faces introduce a direct measurement error equal to the debris thickness. Wipe jaws clean with a lint-free cloth before every use. For vernier scales, compressed air removes dust from between divisions without smearing.
7. Inside jaw offset — forgetting the added dimension
Some calipers (particularly older patterns) add a fixed value (typically 10 mm) to inside jaw readings to account for jaw width. Check your caliper's manual. Many modern digital calipers handle this internally, but it is worth confirming — especially when measuring small inside diameters.
Calibration: Does Your Caliper Need It, How Often, and What If You Drop It?
Calibration is one of the most-discussed topics in workshop metrology — and also one of the most misunderstood.
Does a caliper need to be calibrated?
If you are using a caliper for any measurement that matters — a part that needs to meet a drawing tolerance, a component that will be assembled with another part, or a quality check in a production environment — then yes, your caliper needs to be calibrated against traceable measurement standards. The measurement is only as trustworthy as the instrument, and an uncalibrated instrument is simply a graduated guess.
If you are using it to check rough cut lengths, do layout work, or confirm a plumbing fitting size, formal calibration is not necessary — a zero check and a sanity check against a known reference (a gauge block or a known-good component) is sufficient.
How often should a caliper be calibrated?
There is no single legal requirement for calibration interval — it depends on usage intensity, environment, and the quality system you work under. Practical guidance:
- Light workshop use (occasional measurement): annually, or when in doubt
- Regular production/QC use: every 6–12 months
- ISO 9001 / NATA-accredited environments: interval set by the quality management system, typically 6–12 months, with formal records and traceable certificates required
- High-cycle production (100+ measurements per day): jaw wear accumulates faster — consider 3–6 month intervals and more frequent zero checks
What if I drop my caliper?
A drop is a calibration event, full stop. Even a fall from bench height onto a concrete floor can introduce enough distortion in the beam or jaw pivot to shift accuracy by several hundredths of a millimetre — well beyond the tolerance of precision work. The procedure after a drop:
- Inspect jaws visually for burrs or chips on the measuring faces.
- Close jaws and check zero. If zero error is outside ±0.02 mm, the instrument is suspect.
- Check against a gauge block set or known reference standard across the full measuring range.
- If any reading is outside specification, send for calibration before further use in precision work.
Do not assume a dropped caliper is still accurate just because it looks undamaged. Beam distortion is invisible to the eye.
Where to get a caliper calibrated in Australia
NATA-accredited metrology laboratories provide traceable calibration certificates. Search the NATA register at nata.com.au for accredited laboratories offering dimensional metrology services. Most major cities have at least one NATA-accredited provider. Mitutoyo Australia also offers factory calibration for their own instruments.
Care and Maintenance
A well-maintained caliper will remain accurate for decades. A neglected one will drift within months.
- Clean after use — wipe jaw faces and beam with a lint-free cloth. Remove swarf from the vernier slot with compressed air.
- Light oil — apply a thin coat of instrument oil or light machine oil to the beam and rack after cleaning, particularly in humid environments. Do not oil the jaw faces.
- Store correctly — leave the jaws with a small gap (do not store clamped shut). Store in the case, not rattling in a toolbox drawer where jaw faces can be damaged.
- Battery for digital calipers — remove the CR2032 battery if the caliper will not be used for more than a month. Battery leakage on electronics is a common failure mode on otherwise-good instruments.
- Never use as a clamp or scribe — the jaws are precision-ground measuring surfaces, not gripping tools.
AIMS Caliper Range: What We Stock
AIMS stocks a range of calipers to suit every application and budget, from reliable mid-range Maxigear instruments for everyday workshop use to Mitutoyo precision calipers for toolroom and QC environments.
- Vernier calipers — stainless steel, 150 mm and 200 mm ranges, 0.02 mm and 0.05 mm least count options
- Digital calipers — LCD display, metric/imperial switching, 150 mm to 300 mm ranges, IP-rated options for wet environments
- Mitutoyo — precision vernier and Digimatic digital calipers with NATA-traceable calibration available, SPC output on Digimatic models
If you have been comparing calipers at Bunnings, it is worth knowing the difference in range. Bunnings carries basic digital calipers suited to DIY and light trade. AIMS stocks the same entry-level options alongside mid-range Maxigear workshop instruments and Mitutoyo precision calipers — the brand of choice for toolrooms, QC departments, and anyone who needs more than a basic check. For trade and industrial buyers, AIMS is the more complete stop.
For help selecting the right instrument for your application, call AIMS on (02) 9773 0122 or email sales@aimsindustrial.com.au.
Frequently Asked Questions
What is the difference between a vernier caliper and a digital caliper?
Both use the same mechanical jaws and beam to make contact with the part. A vernier caliper reads the measurement from two engraved scales — a main scale and a sliding vernier scale — requiring the operator to identify the coinciding scale line. A digital caliper uses a linear encoder to read the same position electronically and displays the result on an LCD. Digital calipers are faster and easier to read; vernier calipers require no battery and are more robust in wet or oily environments.
How do you read a vernier caliper in millimetres?
Step 1: check zero with jaws closed. Step 2: close jaws on the part and lock. Step 3: read the last whole millimetre the vernier zero has passed on the main scale. Step 4: find the one vernier division that aligns exactly with any main scale line — multiply that division number by the least count (0.05 mm or 0.02 mm). Step 5: add main scale + vernier reading. Example on a 0.05 mm caliper: main scale 23 mm + 7th vernier division (7 × 0.05 = 0.35 mm) = 23.35 mm.
What is the least count of a vernier caliper?
The least count is the smallest increment the caliper can resolve. A 20-division vernier scale has a least count of 0.05 mm; a 50-division scale has a least count of 0.02 mm. Digital calipers typically resolve to 0.01 mm. For most maintenance and fitting work, 0.05 mm is sufficient. For precision machining and bearing fits where tolerances are tighter than ±0.05 mm, use a 0.02 mm vernier or a digital caliper.
What is zero error in a vernier caliper and how do I fix it?
Zero error occurs when the vernier scale zero does not align with the main scale zero when the jaws are fully closed. It is caused by jaw wear, dirt between jaws, or a previous knock to the instrument. To fix: clean the jaw faces and recheck. On digital calipers, press the zero/reset button with jaws closed. On vernier calipers without a zero-set function, record the error value and correct every reading mathematically, or send for calibration. Always check zero before measuring.
What is parallax error and how do I avoid it?
Parallax error happens when you read the vernier scale from an angle rather than looking straight down at it. Your eye shifts the apparent alignment of the scale lines, producing a reading error of one or two divisions (0.02–0.10 mm). To avoid it: position your eye directly above the scale, perpendicular to the beam face. If alignment is hard to judge, tilt the caliper slightly away from you and look along the lines at a shallow angle — this makes coincidence much clearer.
Does a vernier caliper need to be calibrated?
For any measurement that must meet a drawing tolerance or pass a quality inspection, yes. An uncalibrated instrument is an unverified instrument — there is no way to know how far off it may have drifted. For rough checks, layout work, or confirming approximate sizes, a zero check against a known reference is sufficient. Formal NATA-traceable calibration is required under ISO 9001 quality management systems and any NATA-accredited inspection environment.
How often should a caliper be calibrated?
For light occasional workshop use: annually or whenever in doubt. For regular production or QC use: every 6–12 months. For ISO 9001 environments: calibration interval is set by the quality management system, typically 6–12 months with formal records. For high-cycle production (100+ measurements daily): consider 3–6 month intervals, as jaw wear accumulates faster. After any drop, check zero and verify against a reference before trusting the instrument in precision work.
What should I do if I drop my vernier caliper?
Treat a drop as a calibration event. Even a fall from bench height can distort the beam or jaw pivot enough to shift accuracy by several hundredths of a millimetre. After a drop: inspect jaws for burrs or chips; close jaws and check zero; verify readings against gauge blocks or a known reference across the full range. If any reading is outside specification, send for calibration before using for precision work. Do not assume the caliper is undamaged just because it looks intact — beam distortion is invisible.
Is a cheap vernier caliper accurate enough for workshop use?
It depends on the work. For carpentry, rough fabrication, layout, and fitting checks where tolerances are ±0.5 mm or wider, a budget caliper under $50 is adequate. For precision machining, bearing fits, and quality inspection where tolerances run to ±0.02–0.05 mm, a budget caliper is not reliable — jaw construction tolerances, scale engraving quality, and zero drift are all worse at the budget end. For that level of work, a mid-range instrument ($60–150) or a Mitutoyo is the correct choice.
What makes Mitutoyo calipers worth the extra cost?
Mitutoyo, founded in Japan in 1934, manufactures to tighter accuracy specifications than most competitors — typically ±0.02 mm across the full range. Their Digimatic digital series offers SPC (Statistical Process Control) data output for quality management systems, and their Coolant Proof range is IP67 rated for wet machining environments. Carbide-tipped jaws on precision models resist wear far longer than standard stainless. For toolrooms, QC departments, and any environment where measurement accuracy is audited, the total cost of ownership over the instrument's service life makes Mitutoyo the economical choice.
Can I use a vernier caliper to measure inside diameters?
Yes — using the upper knife-edge jaws. Open them inside the bore until both jaw faces make light contact with the bore wall. Rock the caliper gently to find the true maximum diameter (the position where the reading is largest). Lock and read. Note that some older caliper patterns add a fixed offset (typically 10 mm) to inside readings to account for jaw width — check your instrument's documentation. Most modern digital calipers handle this offset automatically.
What is the difference between a vernier caliper and a micrometer?
Both are precision hand measuring tools, but they serve different purposes and offer different accuracy levels. A vernier caliper measures OD, ID, depth, and step in a single instrument, typically to 0.02 mm accuracy, across a range of 0–150 mm or wider. A micrometer measures a narrower range (typically 25 mm per instrument) but to higher accuracy — typically 0.001 mm (one micron). For most workshop fitting and maintenance work, a caliper is sufficient. For bearing fits, precision shafts, and toolroom gauging, a micrometer is used alongside the caliper for final verification.
Can I use a metric caliper for imperial measurements?
A digital caliper can switch between metric and imperial at the press of a button — this is the most practical solution for a mixed-unit environment. A vernier caliper is typically graduated in one system only (metric or imperial). To use a metric vernier for imperial work, you would need to convert: 1 mm = 0.03937 in. In practice, this is error-prone — use the correct scale for the system you are working in, or use a digital caliper with dual display.
Why does my digital caliper give inconsistent or drifting readings?
Common causes: dirty jaw faces (swarf or film giving a false zero), low or failing battery (CR2032 batteries that are low cause encoder glitches — replace them), moisture or coolant ingress on non-IP-rated instruments (the encoder strip is sensitive to contamination), and worn rack teeth causing the jaw to slip slightly. Fix sequence: clean jaws and beam, replace battery, recheck zero. If inconsistency continues, the encoder strip may be damaged — this typically requires instrument replacement or factory service.
How do I measure the depth of a hole with a vernier caliper?
Place the flat end of the caliper beam across the opening of the hole, perpendicular to the surface. Slide the jaw assembly until the depth rod extends to the bottom of the hole. Keep the beam level — any tilt introduces cosine error (the rod traces a longer path than the true depth). Lock the screw and read the scale. For blind holes, confirm the depth rod tip is resting on the bottom surface and not on a chip or burr, which would give a short reading.
Why is it called a vernier caliper?
The caliper takes its name from French mathematician Pierre Vernier (1580–1637), who described the sliding scale principle in his 1631 publication La Construction, l'usage, et les propriétés du quadrant nouveau de mathématique. Vernier devised the scale as a refinement to the surveying instruments of his time, and his name became permanently associated with the measuring principle. The word 'vernier' now refers generically to any secondary scale that subdivides the divisions of a primary scale to increase resolution — found not only in calipers but also in theodolites, sextants, and other precision instruments.
Are vernier scales still used today?
Yes — manual vernier calipers remain in active use in workshops, toolrooms, and quality control environments. While digital calipers have largely replaced verniers for high-volume production inspection (they are faster and easier to read), manual verniers have practical advantages that keep them relevant: no battery required, no electronics to fail in wet or oily conditions, and a long service life with minimal maintenance. Many experienced machinists keep a vernier caliper as their primary or backup instrument. Reading a vernier scale also builds a deeper understanding of measurement that a digital display does not — which is why vernier calipers remain part of trade training curricula worldwide.
Cross-reference our GD&T Symbols Guide for flatness, perpendicularity, concentricity, parallelism and more.
Cross-reference our V-Belt Measurement guide for classical (A, B, C, D), narrow (SPA, SPB, SPC, SPZ) and FRAS sections.
People Also Ask — Vernier Calipers
Q: What measurements can a vernier caliper take?
A vernier caliper can take four types of measurement using a single instrument: outside measurement (using the large lower jaws to measure external dimensions such as a shaft diameter or block width), inside measurement (using the small upper jaws to measure bore diameters and slot widths), depth measurement (using the depth probe that extends from the tail of the instrument), and step measurement (using the step between the upper and lower jaw faces). Most metric vernier calipers read to 0.02 mm or 0.05 mm resolution.
Q: What is the least count of a vernier caliper and what does it mean?
The least count is the smallest increment of measurement that a vernier caliper can resolve — in other words, the smallest difference in size it can distinguish. A 0.02 mm least count means the instrument can reliably distinguish dimensions that differ by 0.02 mm; a 0.05 mm least count is coarser. The least count is determined by the relationship between the main scale divisions and the number of graduations on the vernier scale. For most workshop and quality control purposes, 0.02 mm is the standard.
Q: What is the difference between a vernier caliper, a digital caliper and a dial caliper?
All three instruments measure the same four dimensions and use the same mechanical jaw and beam construction. They differ only in how they display the reading. A vernier caliper uses a manual scale requiring the user to read the vernier graduation visually. A digital caliper has an electronic displacement sensor and LCD display that shows the reading directly — faster and less prone to reading errors, but requires a battery. A dial caliper uses a rack-and-pinion mechanism to drive an analogue dial gauge and is easier to read than a vernier but less common in modern workshops.
Q: How do I zero a vernier caliper before use?
Close the caliper jaws fully, ensuring no debris is trapped between the measuring faces. If using a digital caliper, press the zero or origin button to set the display to 0.000. For a vernier or dial caliper, check that the zero line of the vernier scale aligns with the zero on the main scale — if it does not, note the offset and subtract it from all readings. On a worn instrument, consistent zero error is preferable to variable error and the offset can simply be applied to every measurement taken.
Q: What does the lock screw on a vernier caliper do?
It locks the jaw position so the reading doesn't drift when you remove the caliper from the part to read it. Always lock before lifting the caliper off the workpiece — most reading errors come from the jaws shifting slightly during removal.
Q: What's the fine adjustment thumb wheel for?
On better-quality calipers, it's a small wheel that lets you make a controlled final movement of the jaw, so you can close onto the part with consistent, repeatable force rather than relying on finger feel alone.
Q: What sizes of vernier caliper does AIMS stock?
150mm and 200mm ranges in stainless steel, with a choice of 0.02mm or 0.05mm least count. Digital calipers are stocked from 150mm to 300mm ranges, including IP-rated options for wet environments.
Q: Does AIMS stock a caliper with NATA-traceable calibration?
Yes — Mitutoyo precision vernier and Digimatic digital calipers are available with NATA-traceable calibration, and the Digimatic models offer SPC output for quality systems.
Q: How is an AIMS vernier caliper different from a Bunnings one?
Bunnings carries basic digital calipers suited to DIY and light trade use. AIMS stocks the same entry-level options alongside mid-range Maxigear workshop instruments and Mitutoyo precision calipers — the choice for toolrooms, QC departments and anyone needing more than a basic check.