

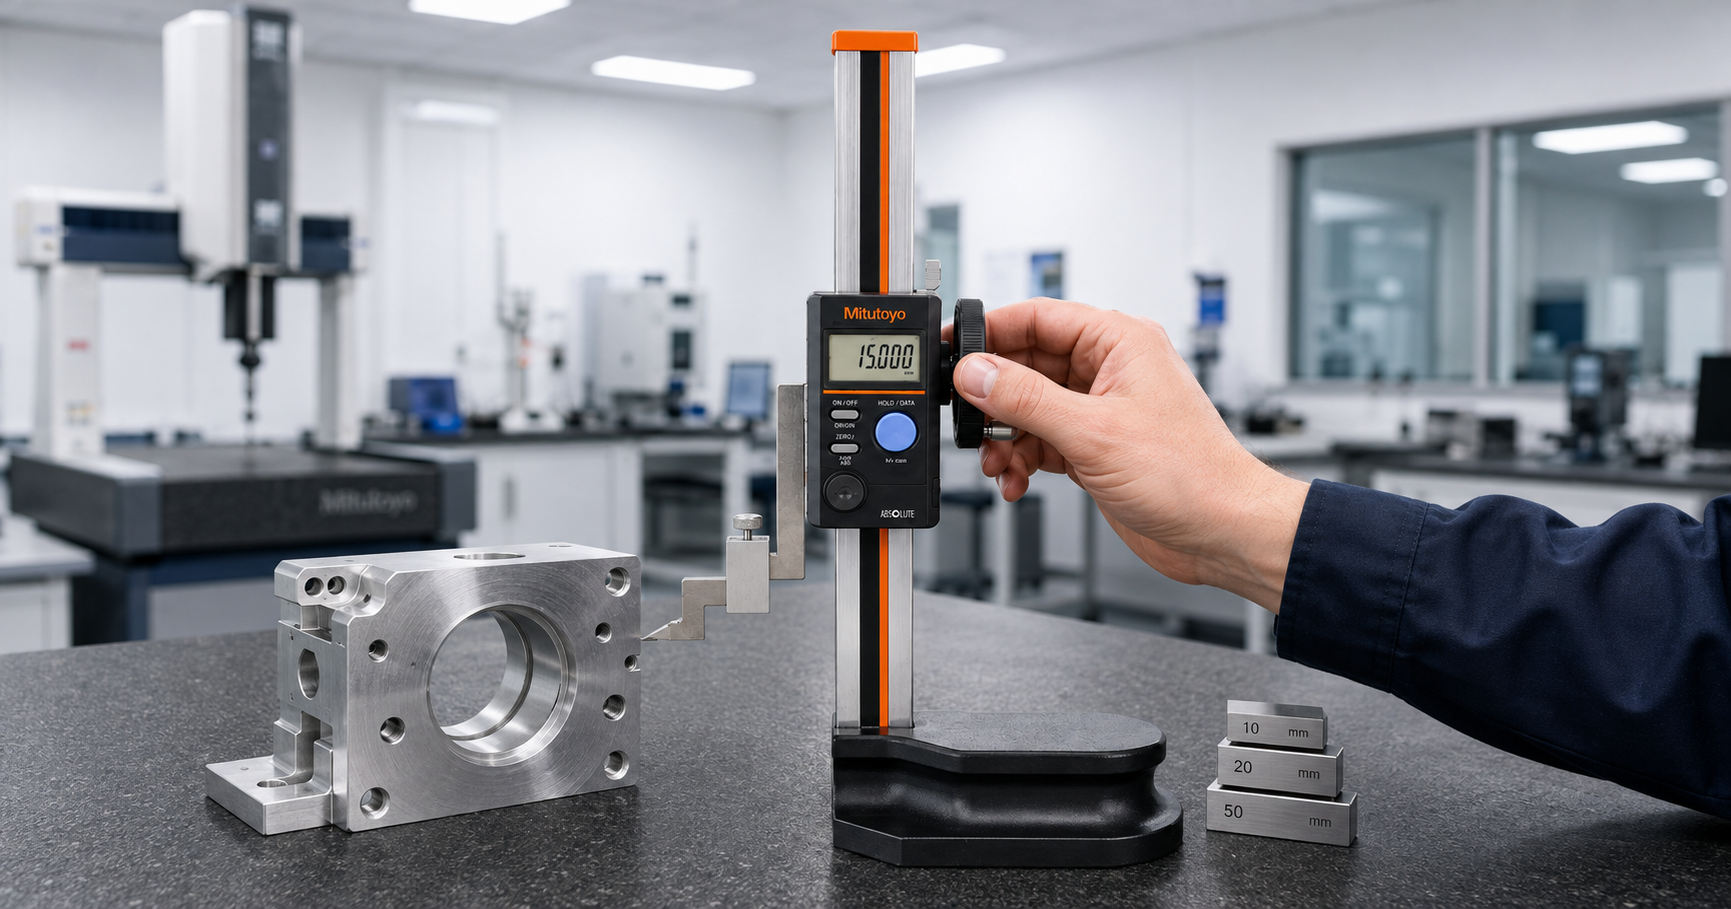
A height gauge is a precision measuring instrument with a fixed base that sits on a surface plate, a vertical column with graduated scale, and a sliding measuring carriage that holds either a scriber for marking out work or a measuring jaw for inspection. It is the workshop tool that combines absolute height measurement and accurate layout scribing into a single instrument. For toolmakers, fitters, machinists and inspection departments across Australian industry, a height gauge is the bridge between the surface plate and the workpiece — every dimension being checked or marked out gets referenced from the plate up to the feature, with the height gauge doing the measurement.
This guide explains how each type of height gauge works (vernier, dial, digital and the modern Mitutoyo ABSOLUTE Digimatic), how to read a vernier height gauge in metric and imperial without rounding errors, the surface plate preparation that separates accurate measurement from systematic error, the scribing technique that lays out a part to drawing tolerance, the zero-offset workaround for older vernier height gauges that do not zero on the surface plate, the JIS B 7517 and ISO 13225 accuracy specifications that govern height gauges globally, the Mitutoyo HD vernier and 570 ABSOLUTE Digimatic series that define the practitioner gold standard, the counterfeit Mitutoyo problem that floods online marketplaces with fakes, the five-check spot-the-fake procedure that identifies them in 30 seconds, and how to choose between workshop-tier Dasqua (stocked at AIMS) and premium-tier Mitutoyo (available through AIMS via our authorised supply chain).
For caliper fundamentals see our Vernier Caliper Guide, Dial Caliper Guide and Digital Caliper Guide. For drawing tolerance work that drives height gauge use see our GD&T Symbols Guide. This article is the height gauge deep-dive.
Vernier vs dial vs digital vs Mitutoyo ABS Digimatic — the four height gauge types — Quick Reference
Practitioner consensus across Practical Machinist, Hobby-Machinist and Model Engineer & Workshop Magazine groups height gauges into four distinct types, each with characteristic strengths and trade-offs:.
| Type | How it reads | Best for | Trade-off |
|---|---|---|---|
| Vernier height gauge | Main scale on the column, vernier scale on the carriage — read mechanically | Toolroom layout work, training, environments hostile to electronics, the absolute reliability case | Older units often don't zero on the surface plate (scriber clamp prevents true zero). Requires the relative-zero workaround. Reading is slower than dial or digital and parallax-prone |
| Dial height gauge | Rack-and-pinion drives a dial face that gives the fractional reading below the main scale | Quick analog reading, comparative measurement against gauge blocks, no battery dependency | Mechanism is delicate. Less common in modern AU industrial settings — most workshops have moved to digital |
| Digital height gauge (workshop tier) | Capacitive encoder drives an LCD display in mm or inches at the press of a button | Fast, low-skill-floor measurement, mm/inch toggle, ABS/INC modes for batch work | Battery-dependent. Cheaper units can lose zero on power-off. Encoder may drift with heavy use. Workshop-tier accuracy is good but not at premium-tier level |
| Mitutoyo ABSOLUTE Digimatic (570 series) | Mitutoyo's patented ABSOLUTE rotary-capacitance encoder — the same technology used in their flagship calipers and indicators | Inspection-grade work, production measurement, SPC data output, any application where the encoder must hold zero through power cycles and battery changes | Premium pricing reflects the encoder technology and the rest of the manufacturing standard. Justified when accuracy and longevity matter |
What is a height gauge — and where it sits in precision measurement
A height gauge is a vertical-axis precision measuring instrument with three functional elements. First, a heavy machined base that sits flat and stable on a surface plate. Second, a vertical column rising from the base with a graduated scale running its full length. Third, a sliding carriage on the column carrying a measuring arm, a scribing tip or a digital readout — depending on the type. The instrument's purpose is to measure or mark heights above the surface plate to a known accuracy, with the surface plate functioning as the absolute zero reference.
Three measurement applications dominate height gauge use:
- Layout scribing — marking accurate horizontal reference lines on a workpiece prior to machining or fitting. The workpiece is placed on the surface plate, the height gauge is set to the required height (often via a gauge block stack or a direct reading), and the scriber tip is dragged laterally across the workpiece to scribe a precise line at that height.
- Dimensional inspection — measuring the actual height of a feature on a finished workpiece. The workpiece sits on the surface plate, the height gauge measuring jaw is brought into contact with the feature, and the gauge displays the measurement.
- Comparative measurement — comparing actual feature heights against drawing tolerance limits using gauge blocks as the reference. Often involves setting a relative zero on the height gauge to the gauge block stack representing the nominal feature height, then reading the deviation directly as the workpiece is checked.
A height gauge is to surface-plate work what a caliper is to bench work — the instrument that does the measurement. The two are not interchangeable. A caliper measures small features held in the hand or on the bench; a height gauge measures vertical dimensions referenced from a precision surface plate, with substantially greater accuracy potential and a layout-scribing capability calipers cannot match. Serious toolrooms and inspection departments own both, plus a surface plate, as a complete precision measurement set.
How a height gauge works — the column, the carriage and the surface plate reference
Every height gauge works on the same principle: the surface plate is the absolute zero. Every measurement the instrument produces is a height above that plate. The height gauge itself reports the position of its sliding carriage on the column, with the column-and-base assembly machined so that when the carriage is at the bottom of its travel, the scriber or measuring jaw sits exactly at the plate surface — giving a true zero reading.
The base is heavy, ground flat on its bottom face to mate with the surface plate, and broad enough to give the column a stable foundation that does not tip during measurement. Mitutoyo HD series bases weigh between 5 kg and 16 kg depending on column height — that mass is part of the measurement system, not just a packaging artefact. A light base would tip under scribing pressure or pick up vibrations from adjacent work, introducing measurement error.
The column is the precision graduated scale, ground straight and parallel to the base over its full length. Column height defines the gauge's measuring range — 300 mm, 450 mm, 600 mm and 1000 mm are the standard sizes. Longer columns require tighter manufacturing tolerances to maintain straightness; a 1000 mm column that bows even 0.1 mm out of straight introduces meaningful error in measurement at the top of its range. The Mitutoyo manufacturing standard for column straightness is the dominant reason serious toolrooms specify Mitutoyo for the 600 mm and 1000 mm sizes.
The carriage carries the readout mechanism — vernier scale, dial face driven by a rack and pinion, or digital encoder driving an LCD — together with the scribing or measuring jaw. The carriage rides up and down the column on hardened ways, with a fine-feed adjustment for precise positioning and a clamp for locking the carriage in place once the position is set. The fine-feed is critical: setting a height gauge to a target dimension to within 0.01 mm requires the fine-feed mechanism to move the carriage in increments smaller than the human hand can resolve, which is what the fine-feed knob and its leadscrew provide.
On a vernier height gauge, the carriage reads against the main column scale via a vernier scale on the carriage — same principle as a vernier caliper. On a dial height gauge, a rack-and-pinion drives a dial pointer that fills in the fractional value below the main scale graduation. On a digital height gauge, a capacitive linear encoder (Mitutoyo ABSOLUTE in the premium tier) reads the carriage position electronically and displays the value on an LCD with mm/inch toggle, ABS/INC modes, data output and battery-backed memory.
Vernier vs dial vs digital vs Mitutoyo ABS Digimatic — the four height gauge types
Practitioner consensus across Practical Machinist, Hobby-Machinist and Model Engineer & Workshop Magazine groups height gauges into four distinct types, each with characteristic strengths and trade-offs:
| Type | How it reads | Best for | Trade-off |
|---|---|---|---|
| Vernier height gauge | Main scale on the column, vernier scale on the carriage — read mechanically | Toolroom layout work, training, environments hostile to electronics, the absolute reliability case | Older units often don't zero on the surface plate (scriber clamp prevents true zero). Requires the relative-zero workaround. Reading is slower than dial or digital and parallax-prone |
| Dial height gauge | Rack-and-pinion drives a dial face that gives the fractional reading below the main scale | Quick analog reading, comparative measurement against gauge blocks, no battery dependency | Mechanism is delicate. Less common in modern AU industrial settings — most workshops have moved to digital |
| Digital height gauge (workshop tier) | Capacitive encoder drives an LCD display in mm or inches at the press of a button | Fast, low-skill-floor measurement, mm/inch toggle, ABS/INC modes for batch work | Battery-dependent. Cheaper units can lose zero on power-off. Encoder may drift with heavy use. Workshop-tier accuracy is good but not at premium-tier level |
| Mitutoyo ABSOLUTE Digimatic (570 series) | Mitutoyo's patented ABSOLUTE rotary-capacitance encoder — the same technology used in their flagship calipers and indicators | Inspection-grade work, production measurement, SPC data output, any application where the encoder must hold zero through power cycles and battery changes | Premium pricing reflects the encoder technology and the rest of the manufacturing standard. Justified when accuracy and longevity matter |
For modern Australian workshops the choice usually comes down to digital workshop-tier (Dasqua and similar) versus Mitutoyo 570 series. The vernier height gauge remains the right choice for very specific applications — training apprentices to read scales properly, working in environments where batteries die regularly, or working in remote locations where electronics service is unreliable. The dial height gauge has largely been displaced by digital in new purchases but remains in service in older inspection departments.
The Mitutoyo 570 series ABSOLUTE Digimatic is the global benchmark for digital height gauges. The ABSOLUTE encoder means the instrument knows its position the moment it is powered on — there is no need to drive to a reference point or re-zero after a battery change. Combined with Mitutoyo's column straightness manufacturing standard and the IP54 coolant-resistant variants, the 570 series is what gets specified on the inspection bench when accuracy across a long working life matters more than initial purchase price.
How to read a vernier height gauge — step by step
Reading a vernier height gauge follows the same principle as reading a vernier caliper, with one practical complication explained in the next section. The main scale on the column is graduated in whole millimetres (metric instruments) or fractions of an inch (imperial instruments). The vernier scale on the carriage gives the fractional part of the reading below the smallest main scale graduation. Add the two together to get the measurement.
Metric vernier height gauge reading procedure
Step 1 — set up. Place the workpiece on the surface plate. Place the height gauge base on the surface plate beside the workpiece. Both must be clean and free of debris (chips, dust, oil that has picked up grit).
Step 2 — bring the scriber or measuring jaw into firm contact with the feature being measured (or set to the desired height for marking out). Lock the carriage using the locking screw. Use the fine-feed for the final adjustment.
Step 3 — read the main scale on the column. Find the last whole millimetre graduation that the zero line of the vernier scale has passed. This is the main scale reading. For example, if the vernier's zero line sits between 142 and 143 on the column, the main scale reads 142 mm.
Step 4 — read the vernier scale on the carriage. Find the one graduation on the vernier scale that aligns most exactly with a graduation on the main scale. The vernier scale graduations are numbered 0 to 50 (for a 50-division vernier) representing 0 to 1.00 mm in 0.02 mm increments. If the vernier graduation that lines up best is 34, the vernier reading is 0.68 mm.
Step 5 — add. 142 mm plus 0.68 mm equals 142.68 mm. That is your measurement.
Imperial vernier height gauge reading procedure
Imperial vernier height gauges typically use a 25-division vernier on a column graduated in 0.025 inch (or sometimes 0.050 inch) increments. The vernier divisions represent 0.001 inch each. Read the main scale at the vernier zero line, then find the vernier graduation that lines up best, multiply that vernier graduation by 0.001 inch, and add to the main scale reading.
The reading discipline that catches errors
Practitioners on Hobby-Machinist and Home Model Engine Machinist emphasise one habit that prevents most reading errors: read the main scale first, write it down, then read the vernier. Do not try to read both at once and add in your head — the cognitive load is what introduces errors. The other discipline: confirm the vernier alignment under good light. A vernier scale that "looks like it might be at 34" because the line at 34 looks closest is not the same as "the line at 34 is the line that visibly coincides exactly with a main scale graduation". Practitioners with experience can read a vernier in under 10 seconds; the time penalty for being careful is small.
The zero-offset workaround for older vernier height gauges
Practical Machinist and Home Model Engine Machinist threads document a recurring frustration with older vernier height gauges: many do not zero on the surface plate. With the carriage driven down to the lowest position, the scriber clamp or the scriber itself prevents the scriber tip from touching the plate. The vernier scale reads zero, but the scriber tip is sitting two or three millimetres above the plate. Every measurement made with that gauge is offset by that gap.
This is not a defect — it is a design consequence of the scriber being held in a clamp rather than being a fixed part of the carriage. On a Mitutoyo HD series vernier height gauge the offset is typically small and consistent. On older or budget units the offset can be 3 mm or more and may vary slightly with how the scriber is positioned in the clamp.
The practitioner workaround is straightforward: take a relative zero reading. Place the scriber tip in contact with the surface plate. Read the height gauge — for example, 2.45 mm. That is your zero offset. From now on, subtract 2.45 mm from every measurement the gauge produces, and the result is the true height above the plate. Some workshops record the zero offset on a tag attached to the gauge case so any operator using the instrument knows to apply the correction.
A cleaner alternative is to set up the workpiece on a precision parallel of known thickness sitting on the surface plate, and measure relative heights from there. The parallel becomes the new reference zero, the height gauge reads relative to that, and the offset problem disappears.
The cleanest solution is to upgrade to a digital height gauge, particularly the Mitutoyo 570 series, where the carriage and the readout are integrated as a single calibrated unit. A digital height gauge with a true-zero reference on the surface plate (using the dedicated reference position designed into the instrument) reads zero on the plate and reads true height above it for every measurement. The vernier-era workaround disappears with the technology change.
Surface plate work — granite vs cast iron, cleaning, preparation
The surface plate is the foundation of every height gauge measurement. Get the surface plate wrong and no amount of height gauge accuracy will save the measurement. The discipline covers material selection, surface preparation and cleaning.
Granite vs cast iron surface plates
Modern surface plates are granite, machined to a precision flatness specification (typically Grade AA, A or B per the published flatness standards). Granite has three advantages over the older cast iron plates: it is thermally stable (low coefficient of expansion compared to cast iron), it does not rust, and a chip or impact damages the plate locally rather than raising a burr that affects measurement across a wider area. Black granite from the South Indian quarries is the workshop standard worldwide. Pink granite is the same stone in a different colour — it works identically.
Cast iron surface plates remain in service in older workshops and have historical advantages: they can be re-scraped if they wear, they are repairable in a way granite is not, and they hold their reference temperature more predictably in environments with steady heating. The disadvantage is rust — a cast iron plate left wet or unprotected pits and develops surface defects within months. Modern toolrooms that replace a cast iron plate replace it with granite.
Grade matters more than material for serious work. Grade AA flatness (laboratory grade, typically plus or minus a few micrometres across the plate) is for high-precision inspection. Grade A is for general toolroom and inspection. Grade B is for workshop layout work. A height gauge specified to plus or minus 0.02 mm cannot deliver that accuracy on a surface plate flatter than plus or minus 0.05 mm — the plate's flatness becomes the limit. Match the plate grade to the work, not the other way around.
Cleaning the surface plate before measurement
Practitioners and the CNCCookbook reference both emphasise this point: clean the surface plate and the height gauge base with denatured alcohol or a specific surface plate cleaning fluid before measurement. Wipe both with a clean rag — no oil, no solvent residue. Inspect the base of the height gauge for any burrs or debris that would prevent it sitting flat on the plate. Inspect the plate for chips or pits in the working area.
A surface plate with even a small dried oil film between the base of the height gauge and the plate introduces a measurable error — the film acts as a packing layer of unknown thickness. Eliminate the film before measurement. Practitioners on Practical Machinist describe the discipline as non-negotiable for inspection-grade work, and useful even for routine layout work where the cumulative effect of small errors adds up across a complex layout.
Scribing technique — Z-scribes, carbide tips and layout dye
The most common single application of a height gauge in an Australian workshop is scribing layout lines onto a workpiece before machining. The technique is straightforward when done correctly and a source of recurring errors when done casually.
Z-shaped scribers and why they matter
Quality height gauge scribers are Z-shaped: the body of the scriber rises from the clamp at the carriage, bends laterally, then drops back down to the working tip. The shape is intentional — when the carriage reads zero on the column, the scribing tip sits at the level of the surface plate. A straight scriber clamped to the carriage cannot achieve this; the clamp adds height to the working tip relative to the carriage zero, and the gauge reads offset (see the zero workaround section above).
The scribing tip itself is typically a tungsten carbide insert brazed onto the end of the Z arm and sharpened to a precise angle (commonly 45 degrees) on its working face. Carbide holds an edge dramatically longer than hardened steel, which matters because a dull scriber lays a wider line. Practitioners on the Model Engineer & Workshop forum quote the rule directly: "If the scriber is blunt, you will scribe a line higher than you wanted to." A dull scriber displaces metal laterally as well as cutting it; the resulting line sits above the intended height. Sharp scribers cut a narrow line at exactly the height the gauge is set to.
Layout dye and why use it
Apply layout dye (Dykem fluid — blue, red or purple are all common) to the workpiece face that will receive the scribed line. Allow the dye to dry. When the scriber is dragged across the workpiece, it removes the dye in the scribed line, revealing the bright metal underneath. The scribed line is then visible as a bright contrasting mark on a coloured background, much easier to follow during subsequent machining than a faint scratch on bare metal.
Dykem fluid dries in a few minutes. Quick-drying versions exist for production layout work. The dye is removed after machining with a solvent (mineral spirits, acetone) — the workpiece does not retain any colouration.
The scribing procedure
Step 1 — apply layout dye to the workpiece face, allow to dry.
Step 2 — set the workpiece on the surface plate in the orientation that places the scribing face vertical (so the scribing line is horizontal when scribed).
Step 3 — set the height gauge to the required scribing height. Account for the zero offset on a vernier height gauge if applicable.
Step 4 — bring the scriber tip into contact with the workpiece face. The scriber should be very nearly horizontal (the Z-shape achieves this when zeroed correctly) and contact the workpiece firmly but not heavily.
Step 5 — drag the height gauge laterally across the surface plate to scribe the line. Keep the base in firm, even contact with the plate. Do not lift, tilt or rock the gauge — these introduce errors. The line should be scribed in one smooth pass.
Step 6 — inspect the scribed line under good light. It should appear as a single bright line of consistent depth and width. Multiple parallel lines indicate the gauge slipped or rocked during scribing; rescribe if so.
Practitioners flag two common errors. First, scribing too hard — pressing the scriber into the workpiece deforms the dye and produces a wide line that does not represent the gauge reading accurately. Second, tilting the gauge during the scribing pass — the scribing tip moves through an arc rather than a straight line if the base lifts off the plate. Both errors disappear with practice and disciplined technique.
Height gauge accuracy and tolerance — JIS B 7517 and ISO 13225
Height gauge accuracy is governed internationally by JIS B 7517 (the Japanese Industrial Standard for vernier, dial and digital height gauges) and ISO 13225 (the international standard for height-measuring instruments). The two standards are broadly compatible. DIN 862 covers calipers and height gauges in the European framework. There is no Australian Standard specific to height gauges; AU industry uses JIS B 7517 and ISO 13225 as the reference, with Mitutoyo's published specifications functioning as the practical benchmark across the AU workshop sector.
The standards specify maximum permissible errors (MPE) by measurement range. Indicative values for a quality height gauge:
| Measurement range | Vernier height gauge MPE | Digital height gauge MPE | Premium digital (Mitutoyo 570) MPE |
|---|---|---|---|
| 0–300 mm | ±0.04 mm | ±0.03 mm | ±0.025 mm |
| 0–450 mm | ±0.05 mm | ±0.04 mm | ±0.030 mm |
| 0–600 mm | ±0.06 mm | ±0.05 mm | ±0.035 mm |
| 0–1000 mm | ±0.08 mm | ±0.07 mm | ±0.050 mm |
Two important caveats. First, MPE is the maximum permitted error for the instrument when calibrated, used at the reference temperature of 20 degrees Celsius, on a surface plate of adequate grade. Errors compound — a height gauge specified to plus or minus 0.04 mm used on a surface plate flat to plus or minus 0.05 mm cannot deliver better than plus or minus 0.09 mm in practice. Match the plate grade to the gauge.
Second, MPE applies to the manufactured instrument in normal use. A height gauge that has been dropped, has a damaged column, a bent scriber or worn ways will not meet its MPE specification. Periodic calibration against gauge blocks is the only way to confirm the instrument is still performing to its specification. For inspection-grade use this calibration should be done annually through a NATA-accredited calibration laboratory and recorded on a calibration certificate. For routine workshop use an annual check is reasonable; for hobby or low-volume work, a check every few years is typical.
Mitutoyo height gauges — the HD, 192, 570 and 518 series
Mitutoyo Corporation, the world's largest precision measuring instrument manufacturer, produces the height gauge range that defines the global benchmark for accuracy and reliability. Four product series cover the application spectrum:
Mitutoyo HD series — vernier height gauges
The HD series is Mitutoyo's vernier height gauge family — HD-30, HD-45 and HD-60 in 300 mm, 450 mm and 600 mm column heights. These are the workhorse vernier height gauges referenced across machinist forums as the practitioner default when a vernier instrument is the right choice. The HD series uses Mitutoyo's column-straightness manufacturing standard, hardened jaw and scriber clamp, and the dual-scale (metric main scale with imperial vernier, or all-metric) options that suit AU industrial users.
Mitutoyo 192 series — Digimatic Height Gauges
The 192 series is Mitutoyo's earlier-generation digital height gauge family — heavy-duty workshop digital height gauges with digital counter or LCD readout. Less common in new specifications than the 570 series ABSOLUTE Digimatic, but still in service across many AU workshops bought during the 192 series production years.
Mitutoyo 570 series — ABSOLUTE Digimatic Height Gauges
The 570 series is Mitutoyo's current premium digital height gauge family — the workshop and inspection standard for digital measurement. The defining feature is the ABSOLUTE rotary capacitance encoder, which means the instrument knows its true position the moment power is applied. There is no driving to a reference point, no re-zeroing after a battery change, no spontaneous loss of zero. Battery life is measured in years rather than months because the encoder draws minimal current.
The 570 series offers ranges from 300 mm to 1000 mm, with IP54 coolant-resistant variants for CNC inspection use, slider feed wheel for precise carriage positioning, ABS/INC modes for batch comparative measurement, and Digimatic data output for connection to SPC inspection systems. Practitioners on Practical Machinist consistently describe the 570 series as the digital height gauge worth investing in.
Mitutoyo 518 series — Linear Height inspection equipment
The 518 series Linear Height (LH-600 and similar) is Mitutoyo's premium inspection-grade height measurement equipment — motorised, programmable, with integrated air-bearing operation and accuracy specifications an order of magnitude tighter than standard height gauges. The LH-600 series is capital inspection equipment, used in dedicated inspection laboratories rather than at the workshop bench. Outside the scope of routine workshop selection, but available in the Mitutoyo range and discussed here for completeness.
The Mitutoyo Linear Height LH-600 Series 518 — High-Performance 2D Measurement System
Linear Height is the step-up category from standard digital height gauges. A workshop digital height gauge (Mitutoyo 570 series, Dasqua digital, similar) reads to roughly ±25 to 30 µm across its working range — fast, hand-operated, repeatable enough for general engineering work but not tight enough for first-article QC inspection on tolerance-critical parts. The Mitutoyo Linear Height LH-600 Series 518 occupies the tier above: a linear encoder running on an air-bearing column, motorised drive on the slider, integrated 2D measurement modes, and accuracy an order of magnitude tighter than any hand-operated instrument. This section is the deep-dive on what Linear Height actually buys you, when it's the right tool, and where AIMS sits in the supply path.
The Linear Height LH-600 is capital inspection equipment. AIMS is bringing the Mitutoyo Linear Height range into stock through our authorised distributor channel — contact our team for current configurations, demonstrations and quote requests.
The four LH-600 variants — what each one is for
| Model | Variant | Position |
|---|---|---|
| LH-600E | Standard, manual carriage move with motorised measurement positioning | The previous-generation production standard, still in wide service |
| LH-600EG | LH-600E + ergonomic power grip handle for full motorised carriage drive | Operator-focused variant for high-throughput inspection labs |
| LH-600F | Current-generation, linear encoder with self-check encoder contamination detection, 8.4" colour TFT LCD | The new specification baseline — modern inspection labs |
| LH-600FG | LH-600F + ergonomic power grip handle | Top-of-line — operator productivity plus current-generation accuracy |
All four variants share the same core specification: 0–972 mm total measuring range, 600 mm slider stroke, ±(1.1 + 0.6L/600) µm displacement accuracy, 5 µm frontal perpendicularity, 4 µm column straightness. The differences are encoder generation (E vs F), self-check capability (F only), display technology, and whether the power grip is fitted.
The accuracy spec decoded — ±(1.1 + 0.6L/600) µm
The formula gives total measurement uncertainty at any height L in millimetres. Worked examples that get cited in QC procedure documents:
- At 100 mm height: 1.1 + (0.6 × 100/600) = 1.1 + 0.1 = 1.2 µm total uncertainty
- At 300 mm height: 1.1 + (0.6 × 300/600) = 1.1 + 0.3 = 1.4 µm total uncertainty
- At 600 mm height (full slider stroke): 1.1 + (0.6 × 600/600) = 1.1 + 0.6 = 1.7 µm total uncertainty
For context, a workshop Mitutoyo 570 series ABSOLUTE Digimatic height gauge delivers around ±25 to ±30 µm across its working range — perfectly adequate for production engineering, but 15× looser than a Linear Height. A standard vernier height gauge sits at ±50 µm typical. Where ±2 µm matters — first-article inspection of milled features, hole position verification on aerospace or medical parts, supplier acceptance inspection of close-tolerance work — Linear Height is the right instrument and a standard digital height gauge isn't.
The pneumatic air-bearing floating system — why this matters more than the spec sheet says
The Linear Height carriage doesn't slide on conventional rails. It rides on a thin film of compressed air supplied through ports along the column. Two modes are operator-selectable: full-floating (used when repositioning the instrument across a granite surface plate without bearing damage) and semi-floating (used during measurement, with reduced air-gap height for stability). The pneumatic float does three things conventional rails can't:
- Eliminates rail-stiction — the carriage glides without friction or stick-slip, so the slider repositions to micrometre accuracy with very light operator input or via the motor drive
- Decouples operator force from measurement — pushing harder against the wheel doesn't move the slider faster or change the reading; the operator-induced variation that plagues hand-operated instruments effectively disappears
- Preserves the granite surface plate — moving a 25 kg instrument across a granite plate normally drags hardened steel base feet across the granite face, gradually scoring it; full-floating mode lifts the instrument clear of the granite for repositioning, eliminating wear
The trade-off: the instrument needs a clean dry compressed-air supply (typically 0.4 MPa filtered) at all times during operation. Without compressed air it can't move. The air bearing is the Linear Height — without it, the instrument is non-functional.
2D measurement mode — what makes Linear Height different from a height gauge
The "Linear Height" name describes the linear encoder. What makes the instrument fundamentally different from a standard height gauge is the 2D measurement capability — measuring features that aren't simple height values:
- Hole position measurement — touch a probe to the top and bottom of a bore, the instrument computes hole diameter and centre height in one operation
- Bolt circle / pitch circle diameter (PCD) — measure each hole centre on a bolt circle, the instrument calculates PCD and angular position automatically
- Perpendicularity — verify that a milled face is perpendicular to a reference within ±2 µm tolerance
- Parallelism and squareness — measure across opposing faces and report deviation
- Angle measurement — measure included angles on chamfers, V-grooves, dovetails
- Straightness — measure deviation along a length, with line-fit calculation
- Complex 2D geometry — sequence of measurements stored and combined for irregular profiles
For a QC inspection lab doing repetitive 2D feature verification on milled, ground or EDM-machined parts, the Linear Height replaces what previously required either a coordinate measuring machine (CMM) — much more expensive and slower per-part — or a series of separate instruments (height gauge, sine bar, angle plate, dial test indicator stand) that each contribute their own uncertainty. Linear Height delivers single-instrument single-fixture 2D inspection at ±2 µm — capability that sits between a workshop bench instrument and a full CMM.
The linear encoder + self-check (LH-600F generation)
The encoder is a linear optical scale running the column length, read by a sensor mounted to the carriage. The LH-600F generation introduced an automated self-check that detects contamination on the encoder strip (dust particles, fingerprint oil, swarf) and warns the operator before contamination affects measurement reliability. The check runs at startup and can be re-run on demand. Practical Machinist QC threads cite the self-check as the key differentiator vs the LH-600E generation — when an instrument is being used to accept or reject ±2 µm tolerance parts, knowing the encoder is uncontaminated before each measurement session is the difference between trusted QC data and surprise audit failures.
Probes, scribers and accessories — the instrument is only as accurate as the contact
The Linear Height base instrument ships with a standard touch probe. The full accessory range covers most workshop and inspection scenarios:
- Touch probes — single-sided and double-sided contacts for top, bottom and side-of-feature measurement, with stylus tips from 1 mm to 5 mm for small-feature access
- Probe extensions — for measuring deeper into bores or below the base plane
- Scribers — for marking-out work using the carriage position as the reference height (the Linear Height becomes a precision scribing tool when needed)
- Depth probes — long-stylus contacts for measuring bore depth, slot depth, blind feature depth
- Lever-type test indicator mounts — for tasks where the Linear Height drives a test indicator across a surface
Workshop forums consistently emphasise that the probe selection matters more than the instrument body. A Linear Height with a worn or contaminated probe delivers the same accuracy as a workshop digital height gauge with a clean probe. Probe condition gets checked at the start of every measurement session — visual inspection, contact-pressure check against a reference, and replacement when worn beyond contact-surface tolerance.
What the Linear Height is NOT — honest scope
- Not a workshop bench instrument. Linear Height requires a granite surface plate (minimum Grade 0 for the accuracy claim to hold), clean dry compressed air, temperature stabilisation, and a dedicated measurement space free from vibration and air currents. A workshop floor at 35°C in summer next to a CNC machine vibrating through the floor is not where this instrument operates.
- Not a CMM replacement. Linear Height is 2D — it measures features along the vertical axis with one horizontal degree of freedom (the operator slides the instrument to the feature). A CMM is 3D with motorised positioning in X, Y and Z. For complex parts requiring full 3D inspection, a CMM is still the right instrument.
- Not for high-volume production. Linear Height is a precision QC instrument, not a production gauging fixture. For thousands of identical parts per shift, dedicated gauging (limit gauges, automated optical inspection, in-process CMM) is faster.
- Not operator-skill-optional. The instrument requires trained inspection operators. Skilled use is the difference between delivered ±2 µm measurements and ±20 µm measurements with the same instrument. Training is a non-optional capex line item.
AIMS Linear Height LH-600 supply
AIMS is bringing the Mitutoyo Linear Height LH-600 range into stock through our authorised distributor channel — LH-600E, LH-600EG, LH-600F and LH-600FG configurations with the full probe and accessory range. Linear Height is capital inspection equipment and we quote on a per-specification basis: model selection, probe configuration, granite surface plate sizing if required, demonstration arrangements, training, NATA-traceable calibration certification. Application advice handled by our team.
For Mitutoyo Linear Height LH-600 pricing and quote requests, contact our team on (02) 9773 0122 or via aimsindustrial.com.au/contact-us. For workshop-bench digital height gauges, see the Mitutoyo 570 series ABSOLUTE Digimatic section above.
⚠️ The counterfeit Mitutoyo problem — and how to spot a fake in 30 seconds
Counterfeit Mitutoyo height gauges, calipers, micrometers and dial indicators flood eBay, Amazon Marketplace, AliExpress and grey-market sellers in numbers that dwarf the genuine market. Practical Machinist and Home Shop Machinist BBS threads catalogue the counterfeit problem in depth. Mitutoyo Corporation maintains an official spot-the-fake page because the problem is that pervasive. Buying from an unauthorised source means a real risk of receiving an unbranded workshop-tier instrument with a forged Mitutoyo logo, a forged serial number, a generic plastic case, no calibration certificate, and no warranty backing.
The economics drive the counterfeit market. A genuine Mitutoyo height gauge from an authorised distributor is many times the price of a workshop-tier alternative. A counterfeit Mitutoyo on eBay or Amazon is often priced at workshop-tier rates. To the unwary buyer this looks like a bargain. In reality the buyer is getting an unbranded workshop-tier instrument with a Mitutoyo logo applied — not a Mitutoyo, and the measurements it produces should never be treated as Mitutoyo-grade.
The deliberate misspellings are a hallmark of the trade. Amazon and eBay listings appear under "Mitutogo", "MITU-tyo", "Mituttoyo", "Mito_tuyo" and other variants designed to slip past Mitutoyo's trademark enforcement while still attracting keyword search traffic. If the spelling on the instrument or its packaging does not exactly match Mitutoyo, it is not a Mitutoyo. There are no exceptions.
The five-check spot-the-fake procedure
The same five-check procedure used for Mitutoyo calipers applies to Mitutoyo height gauges. Run all five before treating any Mitutoyo as authentic, regardless of where it was purchased:
| Check | Genuine Mitutoyo | Counterfeit |
|---|---|---|
| 1. Lateral play of carriage on column | Carriage moves smoothly with no perceptible lateral movement when nudged sideways | Carriage has visible lateral slop — wiggles 0.5 mm or more side-to-side |
| 2. Fine-feed knob feel | Fine-feed rotates with a smooth, slightly heavy, glass-like feel. No grit, no skipping | Fine-feed has a gritty, hesitant feel. Sometimes catches and releases as it rotates |
| 3. "Made in Japan" stamp | Plastic case has "Made in Japan" clearly stamped or moulded on the underside. The instrument itself has Japan marking visible on the base or column | Case underside has no country-of-origin marking, or has a sticker (not moulded text) that peels off easily |
| 4. Column finish and graduation quality | Column has the Mitutoyo satin-chrome finish with crisply etched graduations. Numbers and tick marks are sharp under magnification | Column finish is duller, with painted-on rather than etched graduations on cheaper fakes. Numbers may be fuzzy or off-centre |
| 5. Serial number quality | Serial number is crisply etched, centred, in the correct Mitutoyo font, and matches Mitutoyo's serial number format for the model | Serial number is often fuzzy, off-centre, in the wrong font, or appears to have been added after manufacturing |
One additional check for high-value purchases: the documentation. A genuine Mitutoyo height gauge ships with a Mitutoyo-branded case, a Mitutoyo calibration inspection certificate (with traceable serial number), and a Mitutoyo instruction sheet in multiple languages. Counterfeits typically ship with a generic case and no documentation, or photocopied documentation that does not match Mitutoyo's printing standards. If the calibration certificate is missing or looks photocopied, the instrument is almost certainly not authentic.
The single safest defence is to buy from authorised Australian distributors. Eliminate eBay, Amazon Marketplace, AliExpress and grey-market sellers from your consideration regardless of how attractive the price looks. AIMS sources Mitutoyo precision measuring tools through our authorised supply chain — every Mitutoyo height gauge we supply comes with genuine documentation, calibration certificate and full manufacturer warranty intact.
Height gauge applications — where they actually get used
Height gauges are not occasional-use tools. In a serious workshop the height gauge does work every day. The applications fall into a small number of well-established categories, each with characteristic technique requirements.
Toolroom layout work
Marking out a workpiece prior to machining is the classic height gauge application. The toolmaker receives the engineering drawing, places the rough material on the surface plate, applies layout dye, and uses the height gauge to scribe horizontal reference lines at each feature height. The lines guide the subsequent machining work — drilled hole centres, milled slot positions, ground surface heights, all referenced from the surface plate and laid out before any metal is cut.
First-article and dimensional inspection
When a CNC machine produces a first article (the first part off a new program or new setup), the inspector measures the actual dimensions and compares them to the drawing tolerance. Vertical dimensions are measured with a height gauge on the surface plate. For inspection-grade work the height gauge is paired with gauge blocks (for comparative measurement) and a quality surface plate, and the measurement is recorded on the inspection report.
Fixture and jig setup
Machining fixtures need to be set up with components at the correct heights before parts can be loaded. A height gauge measures the heights of locating pins, rest pads and clamping surfaces on the fixture, verifying they match the design. This is particularly important for CNC machining fixtures where any height error in the fixture translates directly into dimensional error in every part the fixture produces.
Comparative production measurement
In production inspection, height gauges are often used in comparative mode. A reference master is set up on the surface plate, the height gauge is zeroed against the master height, then production parts are checked one after another against that zero. The gauge reads the deviation from the master directly. This is faster than absolute measurement and matches the way inspection charts are drawn — deviation from nominal, not absolute dimension.
Set-up of indicator-based measurement
A height gauge with a dial indicator clamped to the carriage in place of the standard scribing arm becomes an inspection comparator. The indicator reads small deviations from a reference height. This is the bridge between the height gauge and the dial indicator — both instruments working together on the surface plate to deliver fine measurement that exceeds the height gauge's standalone accuracy.
Care and maintenance — keeping a height gauge accurate for decades
A quality height gauge cared for properly will outlast its owner. The discipline is the same set of habits that apply to all precision measuring instruments:
- Always store in the case. The case keeps the gauge away from chips, grit, dust and impact. Never store loose on a bench or in a toolbox drawer.
- Clean the base before every measurement. Wipe the bottom face of the base with a clean rag (no oil). The bottom face is what contacts the surface plate; anything between them introduces error.
- Clean the surface plate before every measurement. Denatured alcohol on a clean rag, allow to evaporate, then proceed.
- Do not drop the gauge. Dropping a height gauge bends the column. A bent column cannot be re-straightened to specification. After any drop, even a short one, run a calibration check against gauge blocks before further use.
- Do not lift the gauge during scribing. Keep the base in firm contact with the plate. Scribing by tilting introduces error and damages the scriber tip.
- Use the fine-feed for final positioning. Coarse-positioning the carriage with the lock screw engaged damages the column ways.
- Do not over-tighten the carriage lock. Light pressure is enough. Over-tightening can distort the carriage and the column.
- Replace dull scribers. A dull scriber tip lays a wider, higher line than the gauge reading indicates. Sharpen or replace.
- Schedule periodic calibration. For inspection-grade use, calibrate annually against gauge blocks through a NATA-accredited laboratory. For routine workshop use, an annual check is reasonable.
- Avoid heating the gauge with your hands. Practitioners on the Model Engineer forum flag this for longer height gauges — picking up a 1000 mm aluminium column and warming it by 5 degrees Celsius adds a measurable expansion to the measurement. Wear gloves or handle by the base for serious work.
Common height gauge mistakes and how to avoid them
| Mistake | Why it matters | Fix |
|---|---|---|
| Not accounting for the vernier zero offset | Old-style vernier height gauges do not zero on the plate. Every measurement is offset by the gap between scriber tip and plate | Take a relative zero reading by touching scriber to plate, record the offset, subtract from each measurement. Or upgrade to digital with true-plate zero |
| Dirty base or dirty surface plate | Any film between the base and the plate is unknown packing — measurement is offset by that thickness | Wipe both with denatured alcohol or surface plate cleaner before measurement. Inspect for chips and burrs |
| Dull scriber | Lays a line higher than the gauge reading indicates because the dull tip deforms metal sideways | Sharpen or replace. Carbide-tipped scribers hold an edge much longer than steel |
| Tilting or rocking during scribing | Scriber tip moves through an arc, not a straight line. Scribed line is not at the height the gauge displays | Keep base in firm contact with plate. Move the gauge laterally in one smooth pass — no lifting, no tilting |
| Reading the vernier under poor light | "Looks close" is not the same as "lines up exactly". Reading error of one division is common | Read under good light. Use a magnifier on long-range gauges. Confirm vernier alignment carefully before recording the reading |
| Heating the gauge with hands | Thermal expansion of the column with body heat adds error, particularly noticeable on long gauges (600 mm, 1000 mm) | Handle the gauge by the base. Wear gloves for inspection-grade work. Allow the gauge to stabilise at workshop temperature before measurement |
| Surface plate not flat enough for the gauge accuracy | Plate flatness becomes the limit. A 0.02 mm gauge on a 0.05 mm plate cannot deliver better than 0.07 mm in practice | Match plate grade to gauge accuracy. Use Grade A or AA plates for inspection-grade work |
| Buying a counterfeit Mitutoyo at workshop-tier price | You get an unbranded workshop-tier instrument with a forged logo, no warranty, no certificate | Buy only from authorised AU distributors. Run the five-check spot-the-fake procedure on any Mitutoyo of uncertain origin |
| Over-tightening the carriage lock | Distorts the carriage and can damage the column ways. Affects accuracy and reduces instrument life | Light, firm pressure is enough. Treat the lock as a position hold, not a clamp |
| Confusing a height gauge with a surface gauge | A surface gauge transfers heights but has no graduated scale. Using a surface gauge as a measuring instrument is a category error | A height gauge has a column scale. A surface gauge does not. Know which tool is in your hand before measurement |
AIMS height gauge range — Dasqua and Mitutoyo via authorised supply
AIMS Industrial supplies height gauges across two tiers: workshop-tier Dasqua (stocked at AIMS, available immediately) and premium-tier Mitutoyo (available through AIMS via our authorised supply chain, sourced on request through our sales team).
Workshop tier — Dasqua digital height gauge
Dasqua is a workshop-tier precision measuring instrument brand widely supplied across Australia. AIMS stocks one Dasqua height gauge model online today:
- Dasqua Digital Height Gauge 300mm Range 0.01mm / 0.0005″ Graduation — 300 mm working range, digital LCD readout with mm/imperial toggle, ABS/INC modes, hardened steel column and base, supplied in a fitted case.
The Dasqua tier is the right answer when you need a working digital height gauge that delivers reliable workshop accuracy without the Mitutoyo investment. For trade training, general fitting and routine workshop layout work, the Dasqua holds its accuracy with reasonable care and is a cost-effective entry to height gauge measurement.
Premium tier — Mitutoyo height gauges via authorised supply chain
For toolroom work, inspection benches, quality lab use, CNC production where the Mitutoyo accuracy and longevity justify the premium investment, AIMS supplies the full Mitutoyo height gauge range through our authorised supply chain. The Mitutoyo range covers:
- Mitutoyo HD series — HD-30, HD-45, HD-60 vernier height gauges in 300 mm, 450 mm, 600 mm column heights
- Mitutoyo 192 series — earlier-generation Digimatic digital height gauges
- Mitutoyo 570 series ABSOLUTE Digimatic — current premium digital, ABSOLUTE encoder, IP54 variants, 300–1000 mm ranges
- Mitutoyo 518 series Linear Height — capital inspection equipment for dedicated inspection laboratories
AIMS is in the process of bringing the Mitutoyo height gauge range into our online store. Until that range is loaded with Shopify product pages, Mitutoyo height gauges are available on request — contact the AIMS team on (02) 9773 0122 or via the contact page for current availability, model selection advice, lead times and quotation. We can supply any Mitutoyo height gauge model you specify, with the manufacturer warranty and calibration certificate intact.
Brands AIMS does not currently stock
Starrett height gauges, Brown & Sharpe height gauges and similar US-origin premium brands are not currently stocked at AIMS. For these specific brand requests, our sales team can advise on the closest Mitutoyo equivalent that we supply through our authorised channel, or refer you to a specialist supplier. Bunnings consumer-tier and supermarket-tier measuring tools are not the AIMS audience — those buyers are better served by consumer retail.
Selection checklist by application
| Application | Recommended tier and range | Reasoning |
|---|---|---|
| Trade training and learning to read scales | Mitutoyo HD-30 vernier (300 mm) via authorised supply, or Dasqua Digital 300 mm online for budget-conscious training | Vernier teaches the underlying scale-reading discipline. Mitutoyo HD-30 is the global teaching standard. Dasqua Digital is the cost-effective alternative when the budget will not stretch to Mitutoyo |
| General fitting and layout work | Dasqua Digital Height Gauge 300 mm (stocked online) | Reliable workshop digital accuracy for routine layout and dimensional checking |
| CNC machining and inspection bench | Mitutoyo 570 series ABSOLUTE Digimatic 300 mm or 600 mm via authorised supply | Production volumes and tighter tolerances justify the ABSOLUTE encoder and IP54 coolant resistance |
| Toolroom layout and prototype work | Mitutoyo HD-30 vernier (for traditional layout) plus Mitutoyo 570 series digital (for production work) | Toolmakers often use both types — vernier for scribing layout work, digital for dimensional measurement |
| Inspection laboratory and quality control | Mitutoyo 570 series with annual NATA calibration; consider 518 Linear Height for inspection-grade work | Inspection grade requires traceable calibration and Mitutoyo-grade accuracy. The 518 Linear Height is the premium specification |
| Large fabrication and structural work | Mitutoyo 570 series 600 mm or 1000 mm | Long-range height gauges magnify column straightness errors. Mitutoyo's manufacturing standard for long columns is the practical reason to specify Mitutoyo at these ranges |
| Field service and site work | Dasqua Digital 300 mm with case, or a Mitutoyo HD-30 vernier if conditions are very harsh | Field environments are tough on instruments. The Dasqua is replaceable; vernier survives conditions that defeat digital electronics |
Height gauge vs dial indicator — when to use which
Height gauges and dial indicators both work on the surface plate but solve different problems. A height gauge measures absolute height above the plate, with the carriage moving through the full measurement range (300 mm, 600 mm, etc). A dial indicator measures small deviations from a reference point, with the indicator stem moving through a much smaller range (typically 10 mm or 0.5 inch) but with higher resolution and accuracy than a height gauge can deliver.
For most workshop measurement, the height gauge is the right tool: scribing layout lines, measuring feature heights to 0.01 mm, comparative measurement against gauge blocks. For very fine deviation work — checking parallelism of two faces, measuring the runout of a rotating part, comparing closely-toleranced features against a reference — the dial indicator clamped to a surface gauge or a height gauge carriage delivers resolution (0.001 mm or 0.0001 inch on premium indicators) that exceeds what a height gauge can provide.
The two instruments work together. A typical inspection setup might use a height gauge to position a dial indicator at a series of measurement points, with the indicator reading the actual deviations at each point. The height gauge provides the gross positioning; the indicator provides the fine measurement. For deeper coverage of dial indicator selection, plunger versus DTI, AGD groups, magnetic bases and IP-rated indicators, see our Dial Indicator Guide.
Frequently Asked Questions
How accurate is a height gauge?
Under JIS B 7517 and ISO 13225, a quality vernier height gauge over a 300 mm range is specified to a maximum permissible error of approximately plus or minus 0.04 mm. A digital height gauge over the same range is typically plus or minus 0.03 mm, and a premium Mitutoyo 570 series ABSOLUTE Digimatic is plus or minus 0.025 mm. Accuracy degrades with measurement range — a 1000 mm height gauge is specified to plus or minus 0.07 to 0.08 mm typical, or plus or minus 0.05 mm for the Mitutoyo 570 premium tier. All specifications assume the instrument is calibrated, used at 20 degrees Celsius, on a surface plate of adequate flatness grade.
How do you read a vernier height gauge?
Place the height gauge base on the surface plate. Bring the scriber or measuring jaw into firm contact with the feature being measured, and lock the carriage. Read the main scale on the column at the vernier zero line — note the last whole millimetre passed. Read the vernier scale on the carriage — find the one graduation that aligns most exactly with a main scale graduation, and note the value (each vernier division is typically 0.02 mm on a 50-division metric vernier). Add the two readings together to get the measurement. Always check the gauge zeroes correctly on the surface plate before measuring; if it doesn't, apply the relative-zero workaround.
What is a Z-scribe and why is it shaped that way?
A Z-scribe is the standard scriber shape used on height gauges — the body rises from the carriage clamp, bends laterally, then drops back down to the working tip. The shape is intentional: when the carriage reads zero on the column, the scriber tip sits at the level of the surface plate, giving a true zero reading. A straight scriber clamped to the carriage cannot achieve this because the clamp adds height to the working tip relative to the carriage zero. The scribing tip itself is typically a tungsten carbide insert brazed onto the end of the Z arm, sharpened to about 45 degrees on its working face.
How do you zero a height gauge that doesn't read zero on the surface plate?
Older vernier height gauges often do not zero on the plate because the scriber clamp or the scriber itself prevents the scriber tip from touching the plate. Workaround: bring the scriber into contact with the plate, read the gauge — say 2.45 mm — and record that as the zero offset. From then on, subtract 2.45 mm from every measurement to get the true height above the plate. Some workshops record the offset on a tag attached to the case. The cleaner alternative is a digital height gauge, particularly the Mitutoyo 570 series, where the carriage and readout are integrated and the instrument reads true zero on the surface plate.
What is the difference between a height gauge and a surface gauge?
A height gauge has a graduated scale on the column and a sliding carriage with a precise readout (vernier, dial or digital). It both measures and scribes. A surface gauge has no graduated scale — it is a heavy base with a clamped scriber, used purely to transfer a height from one location to another (typically from a gauge block stack to a workpiece). Surface gauges are useful for layout work where you have a reference height already set up; height gauges are useful when you need to know what the height is, or set it from scratch. Both work on the surface plate.
Do I need a granite surface plate to use a height gauge?
Yes — a height gauge needs a precision surface plate as its zero reference. Granite is the modern standard because it is thermally stable, doesn't rust, and is more impact-resistant than cast iron. Cast iron surface plates remain in service in older workshops and work the same way; the disadvantage is that they rust and they wear over time. The flatness grade of the plate matters more than the material. A Grade A or AA plate (flat to a few micrometres across the working surface) supports the accuracy of a quality height gauge; a Grade B plate is fine for layout work but limits inspection-grade accuracy.
How do you scribe a line with a height gauge?
Apply layout dye (Dykem) to the workpiece face that will receive the line, and allow the dye to dry. Place the workpiece on the surface plate with the scribing face vertical. Set the height gauge to the required scribing height. Bring the scriber tip into firm contact with the workpiece face — the Z-shape of the scriber should keep it nearly horizontal. Drag the height gauge laterally across the surface plate to scribe the line in one smooth pass. Keep the base in firm contact with the plate; do not lift or tilt the gauge. The scribed line should appear as a single bright mark against the dye background.
What is the difference between a vernier, dial and digital height gauge?
A vernier height gauge uses a mechanical vernier scale on the carriage read against the main column scale. A dial height gauge uses a rack-and-pinion driving a dial face that gives the fractional reading below the main scale graduation. A digital height gauge uses a capacitive linear encoder driving an LCD with mm/inch toggle and ABS/INC modes. The premium Mitutoyo 570 series uses an ABSOLUTE rotary capacitance encoder that holds zero through power cycles and battery changes. Vernier is the most robust and battery-free; dial is faster to read than vernier; digital is fastest and offers data output.
What size height gauge should I buy?
For most Australian workshops, a 300 mm range is the default first purchase. It covers most fastener, fitting and machined-part work and fits the surface plate footprint of most workshops. A 600 mm range is the next step up for larger fabrication and structural work, where parts may have features more than 300 mm above the plate. A 1000 mm range is specialty equipment for very large fabrication and is almost exclusively a Mitutoyo or Starrett purchase because of the column-straightness manufacturing requirement. Going larger than you need adds weight and bulk without benefit, and magnifies any column straightness error.
Are Mitutoyo height gauges worth the premium?
For trade training, hobby use, general workshop layout work and routine fitting where measurements are not safety-critical, the workshop-tier Dasqua Digital Height Gauge stocked at AIMS delivers JIS B 7517-class accuracy at a much lower price. For toolroom layout, inspection bench work, quality labs, prototype development, CNC production with tight tolerances and any safety-critical measurement, the Mitutoyo HD vernier or 570 ABSOLUTE Digimatic investment pays back through accuracy, longevity (a well-maintained Mitutoyo will outlast its owner), the ABSOLUTE encoder that never loses zero on the 570 series, and resale value. The Mitutoyo HD series is the global teaching standard, and the 570 series is the production benchmark.
How do I spot a fake Mitutoyo height gauge?
Run the same five-check spot-the-fake procedure used for Mitutoyo calipers. First, check the carriage for lateral play on the column — a genuine Mitutoyo has no perceptible side-to-side slop, a fake will wiggle 0.5 mm or more. Second, feel the fine-feed knob — genuine has a smooth, slightly heavy glass-like feel; fakes feel gritty. Third, check the case underside for a moulded 'Made in Japan' marking — genuine has it, fakes have no marking or a peelable sticker. Fourth, inspect the column finish and graduation quality — genuine has the Mitutoyo satin-chrome with crisp etched graduations; fakes have duller finish and painted-on graduations. Fifth, check the serial number — genuine is crisply etched in the correct font, fakes are fuzzy or off-centre. Also confirm spelling is exactly 'Mitutoyo' — variants like 'Mitutogo' or 'Mituttoyo' are counterfeits.
Where can I buy genuine Mitutoyo height gauges in Australia?
Buy only from authorised Australian distributors. AIMS Industrial supplies the full Mitutoyo height gauge range — HD series vernier, 192 series digital, 570 series ABSOLUTE Digimatic, and 518 Linear Height — through our authorised supply chain. Call the AIMS team on (02) 9773 0122 with the Mitutoyo model number you need (or describe the application) and we will quote with current availability, lead time and stock confirmation. Every Mitutoyo height gauge supplied through AIMS comes with the manufacturer warranty intact and the calibration inspection certificate included. Never buy Mitutoyo from eBay, Amazon Marketplace, AliExpress or grey-market sellers regardless of authenticity claims.
What is JIS B 7517?
JIS B 7517 is the Japanese Industrial Standard for height gauges — the global de facto reference standard for vernier, dial and digital height gauge specifications. The standard sets maximum permissible errors by measurement range, design requirements for the column, carriage, base and scriber, and calibration guidelines. The international equivalent is ISO 13225. There is no Australian Standard specific to height gauges; AU industry uses JIS B 7517 and ISO 13225 as the reference, with Mitutoyo's published specifications functioning as the practical benchmark across the AU workshop sector.
Can a height gauge be used for inside measurements?
Yes — many height gauges have a depth-measurement or inside-measurement attachment. The carriage carries an offset measuring jaw that allows the gauge to measure a feature that is below the surface plate level (such as a depth into a workpiece) or an inside surface of a recessed feature. The standard configuration for most workshop height gauges is outside / above-the-plate measurement; the inside or depth attachments are accessories that turn the gauge into a more versatile instrument. Check the specific model's accessory range before assuming inside measurement is supported.
What is layout dye and why use it with a height gauge?
Layout dye (Dykem fluid, in blue, red or purple) is a fast-drying solvent-based marking fluid applied to a workpiece face before scribing. The dye dries to an opaque coloured film. When the height gauge scriber is dragged across the dyed face, it removes the dye in a thin line, revealing the bright bare metal underneath. The scribed line is then visible as a bright contrasting mark against the coloured background, much easier to follow during subsequent machining than a faint scratch on bare metal. The dye is removed after machining with mineral spirits or acetone.
What is a Linear Height gauge and how is it different from a digital height gauge?
A Linear Height (Mitutoyo Series 518 LH-600) is the precision-inspection tier above standard digital height gauges. It uses a linear optical encoder running on a pneumatic air-bearing column, motorised slider drive, and integrated 2D measurement modes (hole position, bolt circle PCD, perpendicularity, angle, straightness). Accuracy is ±(1.1 + 0.6L/600) µm — around ±1.7 µm at full 600 mm height — compared to ±25 to ±30 µm for a workshop Mitutoyo 570 series ABSOLUTE Digimatic height gauge. The air-bearing eliminates operator-induced measurement variation, and the 2D capability replaces what previously required either a CMM or a series of separate instruments. Linear Height is dedicated inspection-lab equipment, not workshop-bench equipment.
What is the accuracy of a Mitutoyo LH-600 Linear Height gauge?
The Mitutoyo Linear Height LH-600 series specifies displacement accuracy of ±(1.1 + 0.6L/600) µm where L is the measurement height in millimetres. Worked examples: at 100 mm height, total uncertainty is 1.2 µm; at 300 mm height, 1.4 µm; at full 600 mm slider stroke, 1.7 µm. Repeatability is 0.4 µm on the current LH-600F generation, 0.5 µm on the previous LH-600E. Frontal perpendicularity is guaranteed at 5 µm and column straightness at 4 µm. These figures hold only when the instrument is used on a Grade 0 granite surface plate with clean dry compressed-air supply, temperature stabilised to 20°C reference, and operated by a trained inspection operator. Without those conditions, accuracy degrades significantly.
What is 2D measurement on a height gauge?
2D measurement on a Linear Height refers to the instrument's ability to measure features beyond simple top-of-feature height — hole positions and diameters, bolt circle pitch circle diameters (PCD), perpendicularity, parallelism, angle measurement on chamfers and V-grooves, straightness with line-fit calculation, and complex 2D geometry stored as measurement sequences. The Linear Height computes these values from sequences of point contacts using a touch probe. For QC inspection labs doing repetitive 2D feature verification, the Linear Height replaces what previously required either a coordinate measuring machine (much more expensive) or several separate instruments (each contributing measurement uncertainty). It sits between a standard workshop height gauge and a full CMM in capability, accuracy and cost.
AIMS height gauges — quick links and contact
Browse the AIMS measuring tools collection for current stocked precision measuring equipment including the Dasqua Digital Height Gauge 300mm. For Mitutoyo HD vernier, 570 ABSOLUTE Digimatic, 192 and 518 Linear Height series sourced through our authorised supply chain, contact the AIMS team on (02) 9773 0122 or via the contact page — let us know the Mitutoyo model number or describe the application, and we will quote with current availability and lead time.
Related AIMS guides: Vernier Caliper Guide · Digital Caliper Guide · Dial Caliper Guide · Micrometer Guide · Dial Indicator Guide · GD&T Symbols Guide
Pair this with our How to Measure a V-Belt guide for the right replacement size every time.
People Also Ask — Height Gauges
Q: What is a height gauge used for?
A height gauge measures the height of workpieces from a surface plate reference, marks out scribed lines at precise heights, and verifies part dimensions against a datum. It is a standard metrology room instrument for checking machined components, setting tool heights, and locating features relative to a reference surface.
Q: What is the difference between vernier and digital height gauges?
Vernier height gauges require no battery and are reliable in any environment, but reading the vernier scale requires practice and takes longer. Digital height gauges display measurements directly and allow zeroing at any reference point — useful for step measurements and comparing multiple features quickly. Mitutoyo ABSOLUTE digital height gauges add retained-origin technology so the measurement reference survives power-off.
Q: How do you zero a height gauge on a surface plate?
Lower the scriber or probe until it rests flat on the surface plate (or on a gauge block of known height if setting an offset). On a vernier gauge, note and subtract the reading from subsequent measurements. On a digital gauge, press zero to establish the current position as the datum for all following measurements taken in that setup.
Q: What surface plate should I use with a height gauge?
A granite surface plate is the workshop standard for height gauge work — granite is dimensionally stable, hard, and does not burr when tools are dragged across it. Grade B granite suits general workshop use; Grade A plates are calibrated for precision metrology rooms. Always clean the surface plate before use to remove chips and abrasive particles that would introduce error.
Q: What is the Mitutoyo HD height gauge?
The Mitutoyo HD (High-Definition) height gauge is a high-performance digital height gauge incorporating Mitutoyo ABSOLUTE encoder technology. It retains the measurement origin across power cycles, provides a rigid vertical column for accurate scribing, and outputs high-resolution data to compatible measuring systems. The HD series sits above the standard 192 series in the Mitutoyo range and is suited to production quality assurance and metrology departments.
Q: What does 'retained-origin' mean on a Mitutoyo ABSOLUTE digital height gauge?
Retained-origin technology means the measurement reference point (zero datum) survives a power-off — so the gauge doesn't need to be re-zeroed against the surface plate every time it's switched back on, unlike a standard digital height gauge that loses its zero reference without power.
Q: What's the difference between Grade A and Grade B granite surface plates?
Grade B granite surface plates suit general workshop use, while Grade A plates are calibrated to a tighter tolerance for precision metrology rooms. Both are dimensionally stable and hard enough not to burr when tools are dragged across them, but Grade A is the higher-accuracy reference standard.
Q: What should be cleaned off a surface plate before zeroing a height gauge on it?
Chips and abrasive particles should always be removed from the surface plate before zeroing a height gauge on it — any debris under the scriber or the workpiece introduces measurement error at the datum point, which then carries through every subsequent reading taken in that setup.
Q: What environment is the Mitutoyo HD height gauge series designed for compared to the standard 192 series?
The Mitutoyo HD series sits above the standard 192 series in the Mitutoyo range and is suited to production quality assurance and metrology departments — it uses ABSOLUTE encoder technology, a rigid vertical column for accurate scribing, and outputs high-resolution data to compatible measuring systems.