What Is a Stripped Thread?
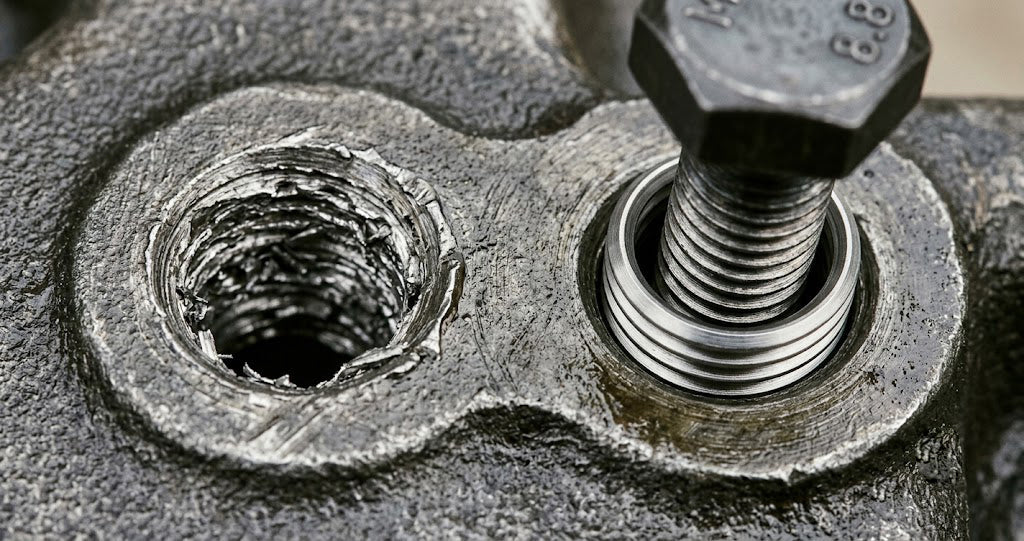
A stripped thread is a threaded hole — or external thread — where the thread profile has been damaged to the point that the original fastener no longer engages reliably. The thread crests have been crushed, sheared, or pulled out; the helical groove that should grip the bolt is now smooth or partially intact at best. The bolt either spins freely without grabbing, pulls out under hand pressure, or strips deeper as you try to tighten it. The joint cannot develop clamping force.
Stripped threads happen for predictable reasons:
- Over-torquing — applying torque beyond the parent thread's yield point, particularly in soft parent materials (aluminium, magnesium, plastic). The most common cause across AU automotive and industrial work.
- Cross-threading — starting the bolt at an angle and forcing it. Damages the lead thread and propagates as the bolt is tightened.
- Repeated cycling on a soft parent — aluminium engine blocks with spark plug threads removed and reinstalled hundreds of times eventually wear out the parent thread.
- Corrosion damage — outdoor and marine threads where the parent metal corrodes and the thread profile degrades.
- Wrong-size fastener — the wrong thread pitch or diameter forced into a hole.
- Heat damage — repeated thermal cycling or localised overheating annealing the parent material.
Thread repair is appropriate when the parent component is expensive or impractical to replace — engine blocks, gearbox housings, machine castings, marine outboard blocks, structural plate. It is not always the right answer; sometimes drilling the hole oversize and using a larger bolt, or replacing the parent component entirely, is faster and cheaper. This guide covers when to repair, what to use, and how to do it.
The full AIMS thread repair range — Recoil wire inserts and keyserts (the AU-stocked brand), Champion budget kits, and individual taps and inserts — is at the Recoil collection at AIMS.
Recoil — The Australian Thread Insert Brand
Recoil is the AU-founded thread insert brand stocked at AIMS Industrial. The Recoil product range covers the two main thread insert technologies in industrial supply:
- Recoil wire inserts (helical inserts) — the diamond-cross-section stainless wire wound into a helical coil that screws into a tapped oversize hole. Dimensionally compatible with Helicoil. The general-purpose option for most AU repair work.
- Recoil Keyserts (key-locking inserts) — solid threaded bushings with locking keys driven into the parent material. Mechanically locked into the parent thread, used where vibration resistance and fail-proof installation are critical.
Recoil's Australian heritage is worth knowing. The Recoil brand originated in Australia and remains the dominant AU industrial thread insert brand at AIMS and through specialist tool suppliers. The Recoil product line is dimensionally compatible with international Helicoil and Heli-Coil products at most sizes — the inserts, taps, and installation tools interchange across most metric and imperial threads.
For most AU thread repair work in this guide we will refer to Recoil and Helicoil together where they are functionally interchangeable, and call out the specific differences where they matter. If you are working off an older purchase order or service manual, our Recoil 2007 → 2013 → 2023 part number cross-reference translates legacy codes to current RC kit numbers.
Recoil Wire Inserts — How They Work and When to Use

The wire insert — Recoil's flagship product, equivalent to Helicoil and Heli-Coil — is the most widely used thread repair technology globally. It is supplied as a tightly-wound stainless steel coil with a diamond cross-section. Each turn of the coil forms a thread profile when installed in a properly tapped oversize hole.
How the wire insert installs
The damaged threaded hole is drilled out to the insert's specific tap drill size, then tapped using a special oversize tap (the Recoil/Helicoil tap is larger than a standard tap of the same nominal thread because it cuts the thread that will receive the insert). The insert is wound into the new tapped thread using a dedicated installation tool. The diamond cross-section springs into the parent thread under tension, locking the coil in place.
The driving tang at the bottom of the coil is then snapped off using a punch and the tang break-off tool — the bolt cannot enter the insert until the tang is removed. The repaired hole now accepts the original-size bolt as if the parent thread had never been damaged.
Why wire inserts are stronger than the original thread
A counterintuitive engineering point. A properly installed wire insert distributes clamping load across the wire's full coil contact with the parent thread — significantly more bearing area than the original tapped thread provided. The wire's spring action also accommodates minor parent thread imperfections that would have weakened a standard thread. A correctly-installed Recoil or Helicoil insert is mechanically stronger than the original thread, not just equivalent. This is why thread inserts are used on aluminium aerospace components and engine blocks where the OE thread design is the weak link.
When to choose wire inserts
- General thread repair on engine blocks, machine castings, gearbox housings
- Aluminium parent material where the soft thread strips repeatedly
- Manifold studs, head studs, mounting points
- Cost-sensitive repairs where high-volume insertion is needed
- Threads that will not be cycled often (assembly threads rather than service threads)
Recoil Keyserts — Key-Locking Inserts for Vibration-Critical Applications

The Recoil Keysert (also called a key-locking insert or Keensert in US trade language) is a solid threaded bushing — not a wound coil. The Keysert has external threads on the body that screw into a tapped oversize hole, with locking keys (typically four small keys around the perimeter) that are driven down into the parent material once the bushing is fully installed. The locking keys mechanically prevent the insert from rotating, even under vibration.
How Keyserts differ from wire inserts
| Feature | Recoil wire insert (Helicoil) | Recoil Keysert (key-locking) |
|---|---|---|
| Construction | Wound stainless wire coil | Solid threaded bushing with locking keys |
| Locking mechanism | Spring tension against parent thread | Mechanical keys driven into parent material |
| Vibration resistance | Good | Excellent — fail-proof |
| Removal | Possible (drill out tang then unscrew) | Difficult — must drill out the locking keys |
| Wall thickness required in parent | Less material needed | More parent material needed for keys |
| Cost per insert | Lower | Higher |
| Best for | General repair, soft parents, engine blocks | Aerospace, vibration-critical, fail-proof joints |
Recoil Keyserts are specified in aerospace, defence, motorsport, and any application where insert rotation-loosening would be catastrophic. The mechanical keys make the insert genuinely permanent — drilling the keys out is the only removal method, which is itself an installation reliability indicator.
When to choose Keyserts
- Aerospace and defence applications where fail-proof matters
- Motorsport and high-vibration machinery
- Any joint where insert rotation under vibration would cause catastrophic failure
- Critical structural mounting points
- Where the parent material is sufficient to accept the locking keys
TimeSert — The Solid Bushing Alternative
TimeSert is a different thread repair technology — a solid one-piece threaded bushing manufactured to a specific bolt size. Unlike a wire insert, TimeSert installs as a single rigid component. The defining feature is the flared top: a small lip at the top of the bushing sits in a counterbore prepared in the parent material, physically preventing the insert from being driven too deep — and critically, preventing it from dropping into engine cylinders or other internal cavities.
TimeSert installation requires:
- Drilling the parent hole to TimeSert's specific drill size (smaller than a Helicoil/Recoil tap drill — TimeSert needs less material removed)
- Counterboring the top of the hole to accept the flared head
- Tapping the hole to the TimeSert thread spec
- Threading the TimeSert in until the flare seats in the counterbore
- Using TimeSert's installation tool to cold-roll-expand the bottom of the bushing — this locks the insert into the parent thread by cold deformation
The cold-roll bottom expansion is what locks the TimeSert in place. There is no tang to break off, no spring tension, no locking keys — just a permanently expanded bottom that grips the parent thread mechanically.
When to choose TimeSert
- Spark plug threads — the AU automotive standard. Spark plug threads cycle every service interval; the rigid TimeSert handles repeated removal and reinstallation better than a wire insert.
- Drain plugs and oil bolt holes — service threads removed and reinstalled regularly
- Engine cylinder threads where insert drop-in is unacceptable — TimeSert's flare prevents the insert from falling into the cylinder during installation. This is the safety reason TimeSert dominates aluminium head spark plug repair.
- Cover bolt threads — covers that come off and back on multiple times in service
The trade-off is cost — TimeSert kits cost considerably more than Recoil/Helicoil kits, and TimeSert requires its specific tooling for each thread size (no interchange with Helicoil tools). For one-off repairs where the application doesn't strictly need TimeSert, Recoil/Helicoil is the cost-effective choice.
Helicoil vs Recoil — Same Product, Different Brand
This is the disambiguation most AU industrial buyers don't realise they need. Helicoil and Recoil are essentially the same product — wire thread inserts to similar dimensional standards — manufactured by different companies. The terms are used interchangeably in AU trade language much as "Biro" became the generic term for ballpoint pens in Australia.
| Aspect | Helicoil | Recoil |
|---|---|---|
| Origin | US (Heli-Coil Corporation, now Stanley Black & Decker) | AU heritage, now part of Stanley Black & Decker |
| Wire insert dimensions | Industry standard helical wire | Industry standard helical wire — interchangeable |
| Tap drill sizes | Same as Recoil | Same as Helicoil |
| Tap dimensions | Special oversize tap, brand-specific | Special oversize tap, brand-specific |
| Installation tool | Brand-specific tool | Brand-specific tool — but works with Helicoil inserts |
| AU stock at AIMS | Not the primary brand | Primary brand — AU stocking advantage |
For AU buyers: when a Helicoil is specified on an OE workshop manual or a parts catalogue, a Recoil insert of the same nominal size will fit and perform identically. The exceptions are the installation tap and the installation tool — these are brand-specific and not interchangeable. If you have a Helicoil kit's tools, use Helicoil inserts; if you have a Recoil kit's tools, use Recoil inserts.
Steel vs Stainless Inserts — Interchangeability and Galvanic Corrosion
Recoil and Helicoil inserts are stocked in two main material grades: stainless steel (304 or 316) and carbon steel (typically phosphor bronze or coated steel for some applications). The question that comes up regularly: can you mix stainless inserts with steel bolts in steel parents, or vice versa?
The short answer: generally yes for dry indoor and most ambient applications, but mixing materials in wet, salt-laden, or chemical environments creates galvanic corrosion risk.
The mechanical question
Insert material and bolt material do not mechanically need to match. The insert provides the thread; the bolt is the fastener. The joint's clamping load is determined by the bolt grade (e.g. Class 8.8 or 12.9), not by the insert material. A stainless insert with a Class 12.9 carbon steel bolt achieves the bolt's full clamping capacity provided the insert and parent thread are correctly sized.
The corrosion question
Galvanic corrosion occurs when two dissimilar metals are in electrical contact in the presence of an electrolyte (water, particularly salt water). The less noble metal corrodes preferentially. The combinations that matter for thread inserts:
| Insert | Bolt | Parent material | Indoor / dry use | Wet / coastal / marine use |
|---|---|---|---|---|
| Stainless | Stainless | Stainless | ✓ Fully matched | ✓ Specify 316 in marine |
| Stainless | Carbon steel | Stainless or steel | ✓ Generally OK | ⚠️ Carbon steel bolt corrodes preferentially |
| Stainless | Stainless | Aluminium | ✓ Generally OK | ⚠️ Aluminium parent corrodes preferentially in salt |
| Carbon steel | Carbon steel | Aluminium | ✓ Generally OK | ⚠️ Aluminium parent corrodes; use anti-seize |
| Carbon steel | Stainless | Any | ✓ Generally OK | ⚠️ Carbon steel insert corrodes preferentially |
Step-by-Step Thread Repair with Recoil/Helicoil
The four-step procedure works across all wire-insert systems (Recoil, Helicoil, Heli-Coil, KATO). Specific tap drill sizes and tap dimensions vary by brand and insert size — refer to the kit instructions.
Step 1 — Drill the damaged thread oversize
Use the drill bit supplied with the kit (or specified in the brand's drill chart). The drill removes the existing damaged thread and creates a clean cylindrical hole sized to accept the special oversize tap. Drill straight — perpendicularity matters. Apply cutting oil. Use a drill press or a guide where accuracy is critical.
Step 2 — Tap the hole with the kit's special tap
The kit-supplied tap is larger than a standard tap of the nominal bolt size. It is dimensioned specifically to cut the thread that will receive the insert. Apply cutting fluid liberally. Turn the tap clockwise to cut, then back off a quarter turn to break the chip — repeat throughout the cut. The quarter-turn back-off is non-negotiable; skip it and the tap will bind, the chip will jam, and the tap will break (sending you to the broken tap removal procedure).
Continue until the tap has cut a full thread through the hole depth. Remove the tap, clear chips from the hole.
Step 3 — Install the insert
Load the insert onto the installation tool with the tang at the bottom. Wind the insert into the tapped hole, applying light downward pressure. Continue winding until the top of the insert is approximately 1/4 to 1/2 turn below the top surface of the parent material. This below-flush position is intentional and correct — the insert is not supposed to be flush with the surface.
Reverse the installation tool to release torque. The insert expands slightly to lock against the new parent thread.
Step 4 — Break off the tang
Use the kit's tang break-off punch (a simple cylindrical punch). Insert the punch into the installed insert until it contacts the tang. Strike the punch sharply with a hammer. The tang shears off cleanly at the notched break point. Remove the broken tang from the hole.
The repaired hole now accepts the original bolt size. Test fit the bolt to confirm the thread is clean and engaging properly.
Insert Size Selection — Drill, Tap and Insert Reference
Recoil and Helicoil insert sizing follows a consistent pattern: the insert designation matches the original bolt size (e.g. M8 insert for M8 bolt repair), but the drill and tap are oversize to the original bolt thread.
| Bolt size | Insert designation | Drill size (mm) | Tap (special) | Insert lengths typically stocked |
|---|---|---|---|---|
| M3 | M3 insert | 3.3 | M3 STI tap | 1.5d, 2d |
| M4 | M4 insert | 4.3 | M4 STI tap | 1.5d, 2d |
| M5 | M5 insert | 5.5 | M5 STI tap | 1.5d, 2d, 2.5d |
| M6 | M6 insert | 6.3 | M6 STI tap | 1.5d, 2d, 2.5d, 3d |
| M8 | M8 insert | 8.4 | M8 STI tap | 1.5d, 2d, 2.5d, 3d |
| M10 | M10 insert | 10.4 | M10 STI tap | 1.5d, 2d, 2.5d, 3d |
| M12 | M12 insert | 12.4 | M12 STI tap | 1.5d, 2d, 2.5d, 3d |
| M14 | M14 insert | 14.5 | M14 STI tap | 1.5d, 2d, 3d |
| M16 | M16 insert | 16.5 | M16 STI tap | 1.5d, 2d, 3d |
| M20 | M20 insert | 20.5 | M20 STI tap | 1.5d, 2d, 3d |
| M24 | M24 insert | 24.5 | M24 STI tap | 1.5d, 2d, 3d |
Insert length is given in multiples of the bolt diameter (d). 1.5d is the standard length for most general repair work; 2d and 2.5d are used where higher clamping load or extra thread engagement is needed; 3d is used for high-load critical applications, particularly in soft parent materials. For the matching tap selection, see our Tap & Die Guide — note that thread insert taps (STI taps) are different from standard taps and are not interchangeable with a standard tap & die set.
Common Australian Applications
Engine block thread repair
The most common AU thread repair application. Aluminium head spark plug threads stripped from over-torquing or thread wear → TimeSert (anti-drop flare design preferred for cylinders). Engine block manifold studs, head bolts, and accessory mounts → Recoil/Helicoil (cost-effective, sufficient for assembly threads). Particularly common on motorcycles, older vehicles, and equipment with aluminium heads.
Marine outboard motor repair
Salt water corrosion damages aluminium outboard motor block threads — common on Mercury, Yamaha, Honda outboards. Stainless 316 inserts with stainless 316 bolts is the standard; carbon steel inserts will corrode and seize. Use anti-seize on installation. The exhaust manifold and cooling water gallery threads are the highest-frequency repair points.
Industrial machinery and pump housings
Cast iron pump bodies, machine castings, and gearbox housings with stripped threaded mounting holes. Recoil wire inserts handle the bulk of this work; Keyserts where vibration is a concern.
Motorcycle and small-engine repair
Aluminium crankcase covers, drain plugs, valve cover bolts, sprocket cover bolts. AU motorcycle workshops use Recoil/Helicoil for most repairs; TimeSert for spark plug threads where they cycle frequently.
Agricultural and 4WD off-road
Tractor PTO covers, implement mounting threads, differential cover bolts, hub stud threads. Cast iron and steel parents — Recoil wire inserts are the standard, with Keyserts for vibration-critical mountings.
Aerospace and high-reliability applications
Recoil Keyserts (key-locking inserts) — the aerospace standard. Used in airframe components, defence equipment, motorsport, and any application where insert rotation under vibration would cause catastrophic failure.
When NOT to Use a Thread Insert — and the Loctite/JB Weld Debunk
Drill out and use a larger bolt
If the application allows a larger bolt size, drilling the damaged hole oversize and re-tapping to the next thread size (e.g. M8 stripped → drill out to M10) is faster, cheaper, and equally reliable. Common where the design is not size-specific and the bolt circle clearance allows. Saves the cost of a thread insert kit and the installation time.
Replace the parent component
Where the parent component is cheap or readily available, replacement is sometimes faster than repair. A stripped bolt hole in a $50 cover plate is not worth a $200 thread repair kit. Make the economic call: cost of repair (kit + labour + risk) vs cost of replacement.
Loctite, JB Weld and "thread filler" — the debunk
If a forum or YouTube video suggests "just glue it" — that is appropriate only for non-structural applications. For any joint that will see vibration, load, or service removal, install a Recoil or TimeSert insert. The repair is permanent and reliable; the glue is a temporary fix that will fail.
AIMS Industrial Thread Repair Range
The full AIMS thread repair stock — Recoil inserts, Recoil tools, Champion budget kits, individual taps — is at the Recoil collection at AIMS.
Recoil — the AU primary brand
The Recoil range stocked at AIMS covers:
- Recoil wire inserts — stainless steel, M3 through M24 metric, 1.5d / 2d / 2.5d / 3d lengths, in individual packs and kit form
- Recoil Keyserts — key-locking inserts for vibration-critical applications, M5 through M16
- Recoil installation tools — kit-specific installation tools, taps, drills, and tang break-off punches
- Recoil thread repair kits — complete thread repair sets in common sizes (M5 / M6 / M8 / M10 / M12)
Champion — the budget alternative
For occasional repair work and non-critical applications, the Champion CTRK14125 Thread Repair Stainless Steel Kit is a cost-effective option. The kit covers common sizes for general workshop repair. Budget Champion kits are appropriate for one-off jobs, hobby workshops, and non-critical applications. For serious workshop work with regular thread repair, the Recoil range is the better long-term investment.
Companion product groups
- Stud Extractor Guide (Art 138) — when removing the broken fastener that damaged the thread
- Broken Tap Removal (Art 30) — when the tap breaks during the repair installation
- Tap & Die Guide (Art 41) — note that thread insert taps are different from standard taps
- Penetrating Oil Guide (Art 67) — for removing the original damaged fastener
- Thread Locking & Sealing Guide (Art 44) — Loctite has its place, but not for thread repair
- Bolt Grade Chart (Art 11) — matching bolt strength to repaired joint
Frequently Asked Questions
What is a stripped thread?
A stripped thread is a threaded hole or external thread where the thread profile has been damaged so that the original fastener no longer engages reliably. The thread crests have been crushed, sheared, or pulled out, leaving a smooth or partially-intact surface that cannot develop clamping load. Common causes include over-torquing (especially in aluminium parent material), cross-threading, repeated cycling, corrosion damage, wrong-size fastener, and heat damage. Repair using a thread insert (Recoil, Helicoil, TimeSert) restores the original thread size in the damaged hole.
What is the difference between Helicoil and Recoil?
Helicoil and Recoil are essentially the same product — wire thread inserts to similar dimensional standards — manufactured by different companies (both now part of Stanley Black & Decker). The wire inserts themselves interchange dimensionally for most metric and imperial sizes. The exception is the installation tap and the installation tool — these are brand-specific. If you have a Helicoil kit's tools, use Helicoil inserts; if you have a Recoil kit's tools, use Recoil inserts. Recoil is the AU-founded brand and the primary stock at AIMS Industrial.
How do you repair a stripped thread?
The standard wire-insert repair procedure is: (1) drill the damaged hole oversize using the drill bit supplied with the thread repair kit; (2) tap the hole with the kit's special oversize tap (different from a standard tap); (3) wind the insert into the tapped hole using the installation tool until the insert sits 1/4 to 1/2 turn below the surface; (4) break off the driving tang at the bottom of the insert using the kit's punch. The repaired hole then accepts the original-size bolt as if the parent thread had never been damaged. For premium / high-cycle applications, a TimeSert solid bushing is installed similarly but with a counterbore and cold-roll-expansion finish.
What is the difference between Helicoil and TimeSert?
Helicoil (and Recoil) are wire inserts — a coiled diamond-cross-section wire that springs into place. TimeSert is a solid one-piece threaded bushing with a flared head that sits in a counterbore and a cold-rolled bottom that expands during installation. Wire inserts are cheaper, more widely stocked, and suitable for general repair. TimeSert costs more but tolerates repeated removal and reinstallation better, and the flared head physically prevents the insert from dropping into engine cylinders during installation. Use Helicoil/Recoil for assembly threads and one-off repair; use TimeSert for spark plug threads, drain plugs, and any thread that will be cycled frequently in service.
Are thread inserts as strong as the original thread?
Properly installed wire thread inserts are typically stronger than the original thread, not just equivalent. The wire insert distributes clamping load across the wire's full coil contact with the parent thread — significantly more bearing area than the original tapped thread provided. The wire's spring action also accommodates minor parent thread imperfections. This is why thread inserts are used as original equipment in aluminium aerospace components and aluminium engine blocks where the OE thread design is the weak link. Improper installation (insert too high, tang not removed, wrong tap drill size) is the only common reason inserts fail.
Will Loctite fix a stripped thread?
No. Loctite is a thread retaining adhesive designed to prevent vibration loosening on a sound thread — it has no structural strength to rebuild missing thread material. For non-structural cosmetic applications (dust covers, plastic threads, decorative bolts) Loctite may temporarily hold a stripped fastener, but for any joint that develops clamping load — engine bolts, structural fastenings, anything load-bearing — Loctite is not a thread repair. Install a Recoil, Helicoil, or TimeSert insert; the repair is permanent and reliable.
Will JB Weld fix a stripped thread?
No. JB Weld and similar epoxies will fill a stripped hole and bond to the parent material, but the resulting joint is weaker than the original thread by an order of magnitude — entirely inadequate for any load-bearing or service-removable application. Some YouTube tutorials and forum posts suggest using JB Weld for thread repair; this advice is appropriate only for non-structural plastic-cover bolts or decorative fastenings. For any structural or service thread, install a proper thread insert.
What size drill bit do I need for an M8 Recoil insert?
An M8 Recoil insert requires an 8.4 mm drill bit (some kits specify 8.5 mm — refer to your specific kit's instructions). This is larger than a standard M8 tap drill (6.8 mm) because the Recoil/Helicoil tap must cut a larger thread to receive the insert. The drill, special tap, and installation tool are all matched to the insert size and must be used together. Thread repair kits supply all three components — never substitute a standard M8 tap for the special insert tap; the threads will not match and the insert will not seat correctly.
Can you reuse a thread insert?
Wire inserts (Recoil, Helicoil) are not designed for reuse — once removed, the spring tension is lost and the insert no longer locks reliably. Replace any insert that has been removed. TimeSert solid bushings can be reused if removed carefully (the cold-roll bottom expansion does not reset to its installed dimension), but in practice replacement is the standard. Keyserts cannot be reused — the locking keys are deformed during installation and removal requires drilling them out, which destroys the insert.
How do you remove a Helicoil or Recoil insert?
Wire insert removal requires a Helicoil/Recoil extraction tool — a small tapered tool that bites into the top of the coil and unscrews it counterclockwise. If the original tang has been removed (as it should be after installation), the extraction tool grips the coil's top turn. If the insert is stuck or damaged, the removal procedure is to drill out the insert with a drill bit slightly smaller than the parent thread's tap drill — this destroys the insert but preserves the tapped hole, allowing a new insert to be installed.
What is a Keysert and when do you use one?
A Recoil Keysert (also called a key-locking insert or Keensert) is a solid threaded bushing with locking keys that are driven into the parent material after the bushing is installed. The mechanical keys prevent the insert from rotating under vibration — a fail-proof installation. Used in aerospace, defence, motorsport, and any vibration-critical application where wire insert rotation-loosening would cause catastrophic failure. Trade-offs: higher cost than wire inserts, more parent material required to accept the locking keys, removal requires drilling out the keys. For general repair, Recoil wire inserts are the cost-effective choice; for fail-proof critical applications, specify Keyserts.
Can I just drill out the hole and use a larger bolt?
Often yes. If the application allows a larger bolt size (the bolt circle clearance permits, the design is not size-specific, and the parent material is thick enough), drilling the damaged hole oversize and re-tapping to the next thread size (M8 → M10, M10 → M12) is faster, cheaper, and equally reliable. Saves the cost of a thread insert kit and the installation time. The decision factors: is the bolt size constrained by the design (mating component, OE specification, hole pattern), and is the parent material thick enough to accept a larger thread? If both are yes, drilling oversize is often the better answer.
Can I mix steel and stainless inserts with different bolt materials?
Mechanically yes — the insert provides the thread; the bolt is the fastener; clamping load is determined by bolt grade not insert material. For dry indoor and most ambient industrial applications, mixing stainless inserts with carbon steel bolts (or vice versa) is acceptable. The caveat is galvanic corrosion in wet, salt-laden, or chemical environments. In coastal AU sites within 1 km of surf, marine, swimming pool, food processing brine, and chemical environments, match all components (insert, bolt, parent) to the same material family or specify all stainless 316. Use anti-seize compound on threads to slow galvanic action where mixed materials are unavoidable.
What's the best thread repair for engine blocks?
Depends on the specific thread. For aluminium head spark plug threads (cycling every service interval, in cylinder so insert drop-in matters), TimeSert is the AU automotive standard — the flared head prevents the insert dropping into the cylinder during installation. For engine block manifold studs, head bolts, accessory mounts, and other assembly threads (installed once, rarely removed), Recoil/Helicoil wire inserts are the cost-effective choice. Marine outboard motor blocks (salt corrosion on aluminium) need stainless 316 inserts with stainless 316 bolts. Match the insert technology to the application's cycling and environmental demands.
How tight should I install a thread insert?
The insert itself does not have a specified torque — installation is done by hand using the kit's installation tool, winding the insert into the tapped hole until the top of the insert sits 1/4 to 1/2 turn below the parent surface. This below-flush position is intentional and correct. The bolt that is then installed into the repaired hole is torqued to the original bolt's specification — the insert does not change the bolt torque value. As a guide for AU automotive: M6 ≈ 8-10 Nm, M8 ≈ 20-25 Nm, M10 ≈ 40-50 Nm, M12 ≈ 65-80 Nm — always defer to the OE workshop manual where one is specified. Apply anti-seize on stainless threads before installing the bolt.
Pair this with our Metric Bolt Size Guide for the thread pitch, AF dimension and grade options at every common size.